Add Row
Add Element
cropper
update
Home Owners Vibes
update
Add Element
  • Home
  • Categories
    • interior
    • decor
    • inspiration
    • atmosphere
    • trends
    • design
    • comfort
    • Food & Travel
    • House Hold Tips & Ideas
    • home
    • Home Improvement Tips
    • Roofing & Exterior Maintenance
    • Interior Remodeling & Design
    • Budgeting & Financing for Home Projects
    • Hiring & Working with Contractors
    • Landscaping
    • Garden
    • Real Estate
July 29.2025
3 Minutes Read

Cool Down Your Car Fast: Discover This Simple TikTok Hack

Car climate control set to 21 degrees in auto mode for fast cooling.

Beat the Heat: A Viral TikTok Hack to Cool Your Car

Summer can be brutal on our cars, leaving them sweltering under the sun and turning every drive into a sauna. If you’ve ever jumped into a hot vehicle, you know the discomfort it can cause. Fortunately, one TikToker, Pushing Pistons, has devised a simple yet effective hack to cool down your car quickly and efficiently.

Step-by-Step Cooling Process

The first step is easy: roll down all the windows on the passenger side. Next, Pushing Pistons suggests a unique action—open and close the driver’s side door repeatedly. This motion helps to release the trapped hot air from inside the car. After expelling the heat, roll up all the windows once the interior begins to cool.

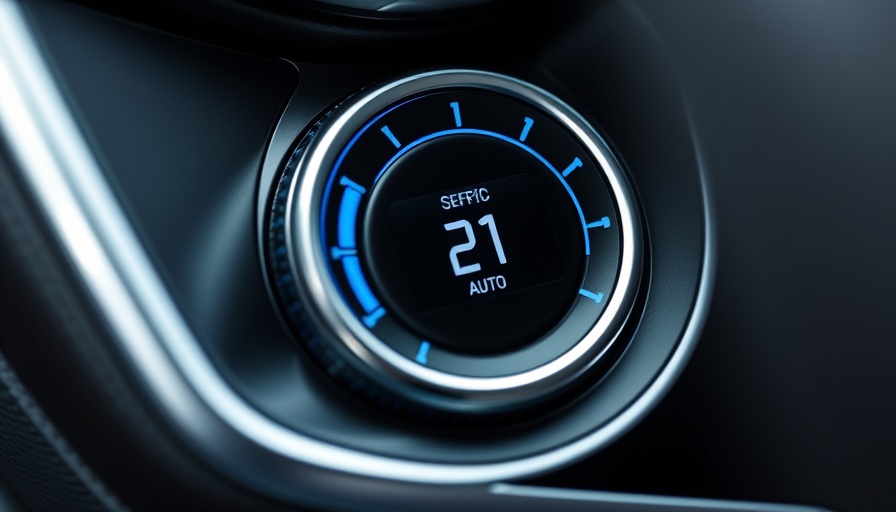
Then, turn on your car’s air conditioning, ensuring it’s set to pull air from the foot well rather than the higher vents. This tactic allows the cold air to push the hot air upwards, creating a more effective cooling cycle. After achieving a comfortable temperature, you can switch the air circulation back on for better efficiency.

Understanding the Science Behind the Hack

This hack can be attributed to the basic principle of how air works: hot air rises. By allowing cooler air to enter from lower vents, it pushes the hot air out more rapidly. This methoding works faster than trying to cool your car with the air circulating through the higher vents.

The Importance of Air Conditioning Settings

Exact settings on your air conditioning gear can have a substantial impact on your car’s internal temperature. Keeping your air conditioning set to pull air from the outside while exhausting the hot air through an open door is critical. Once your interior temperature drops, switching back to recirculation mode helps maintain that cooler temperature efficiently.

Practical Tips for a Cool Car

Here are a few practical tips that can further enhance your car cooling experience:

  • Parking Strategies: Whenever possible, park in shaded areas or use windshield shades to block sun exposure.
  • Window Tinting: Consider window tints that block UV rays and help keep your interior cooler.
  • Regular Maintenance: Keep your air conditioning system checked regularly to ensure it functions properly, especially before summer.

Why This Hack Matters

In today's fast-paced world, efficiency and comfort are paramount, and knowing how to quickly cool down your car can enhance your overall driving experience. Not only will this hack save you time, but it will significantly increase your comfort during long summer drives. There’s nothing like getting into a cool car instead of being greeted by a wave of heat.

As we continue to rely on our vehicles, especially during hot months, staying informed about these clever hacks allows us to navigate such challenges effectively. Simple solutions such as this TikTok hack remind us that innovative ideas can make a real difference in our daily lives.

Take Action to Stay Cool!

Ready to beat the summer heat in your car? Try out this TikTok hack today or share it with someone who might find it helpful! Your comfort during summer drives is worth it!

Home Improvement Tips

1 Views

0 Comments

Write A Comment

*
*
Related Posts All Posts
10.30.2025

Discover 10 Fun Hiding Spots to Keep Your Elf on the Shelf Exciting

Update Unleashing Holiday Spirit: 10 Fresh Hiding Spots for Your Elf on the Shelf The Elf on the Shelf tradition has grown to become a beloved holiday staple in homes across the globe, even though it has only been around for two decades. To keep the magic alive and the excitement high among your kids, it's time to add some creativity to your Elf's daily escapades. Instead of returning to the same predictable hiding spots, let’s explore fun and clever new locations that will spark joy this festive season! 1. A Merry Guard on Your Christmas Tree What better way to incorporate your Elf into your holiday decor than hiding him among the branches of your Christmas tree? Nestle your Elf amid the ornaments or swap out the tree topper with the Elf one morning to give your kids a delightful surprise. This whimsical hiding spot brings a twist to the traditional tree decoration! 2. The Bookish Buddy If your home is filled with the charm of books, use your overflowing bookshelf as a playground for your Elf. Tuck him between the books or allow him to lounge on a shelf alongside cherished knick-knacks. This spot not only encourages imagination but also promotes an appreciation for reading. 3. Refrigerator Rooftop Hideout For those with families who love a good snack, the top of the refrigerator is a surprising hiding spot! Have your Elf peek out from behind paper towels or perched near cereal boxes, adding a bit of fun to morning routines as kids race to find their mischievous visitor. 4. Toy Collection Companion Your kids’ toy collection is a perfect spot for the Elf to join in on the fun. Make the Elf blend in with stuffed animals or toys, reinforcing the idea that he’s making new friends while playing hide and seek. This spot can foster creativity and social skills through imaginative play. 5. Winter Wardrobe Observer If you're in a region that experiences winter, the coat rack serves as an excellent hiding spot. Place your Elf among the coats and scarves on your coat tree, and watch the delight spark as your children search for their frosty friend when coming home from school. 6. Tabletop Centerpiece Surprise Your dining table centerpiece can serve as an interesting hideaway. If you can safely place him among the decor, let your Elf join the family at mealtime! This interactive setup makes dinner a time of excitement as kids look for their Elf while setting the table. 7. Climbing the Garland If your home is adorned with garlands, take advantage of them by hiding your Elf within the greenery. This hiding spot not only looks festive and pleasing, but it also turns the garland into an adventure zone for Elf seekers. 8. Cozying Up by the Couch For those chilly winter evenings, tucking your Elf among the cozy blankets or in a hamper near your couch helps recreate the feeling of warmth and comfort. Your kids will find it amusing to spot him snuggled in for warmth! 9. Garden Window Explorer If you have a garden window in your kitchen filled with plants, encourage your Elf to take a hideaway amongst the leaves. This adds a sense of nature and design to his hiding spot while providing your kids with a delightful search experience. 10. Fruit Bowl Follies Place your Elf near the fruit bowl, making him appear to join in on healthy living. Kids will get a kick out of discovering that their Elf has taken an interest in something fresh and nutritious! The key to maximizing the Elf on the Shelf experience is mixing up the hiding spots to keep your children engaged. Incorporating these fun suggestions not only promotes a spirit of discovery but also nurtures imagination and play. Take a moment to relish in the holiday season, and watch as your home transforms into a magical adventure every morning! Ready for Elf Magic? As the festive season approaches, embrace the holiday spirit by trying out these fresh hiding spots. Engaging your family in this playful tradition can create lasting memories. Take a moment to discuss your Elf on the Shelf experiences with family and friends, and let them know how they too can infuse excitement into their homes!

10.29.2025

Discover How to Use Temporary Hooks Without Damaging Your Walls

Update Understanding the Benefits of Temporary Hooks Temporary hooks have revolutionized the way homeowners can decorate and organize their spaces without damaging walls. These innovative products allow you to hang items with minimal risk of creating unsightly holes or marks, ideal for renters or anyone reluctant to commit to permanent solutions. The key to successfully using them lies in understanding the different types available and how to apply them correctly. Types of Temporary Hooks and Their Best Uses There are three main types of temporary hooks: adhesive strips, suction hooks, and magnetic hooks. Each type has its strengths depending on the surface and the weight of items being hung. Adhesive Strip Hooks: These hooks utilize strong, pressure-sensitive adhesives and work best on smooth, non-porous surfaces. However, be sure to avoid using them on textured walls or surfaces that have been painted recently. Suction Hooks: Suction hooks rely on a vacuum seal to hold items up. They perform admirably on smooth surfaces like tile or glass but may slip if overloaded. Regular maintenance is critical to ensure they do not pull down anything that’s hanging. Magnetic Hooks: These are excellent for metal surfaces and are less likely to damage walls. However, care should be taken to clean both the hook and the surface to avoid scratches upon removal. Why Proper Surface Preparation Matters To prevent damage from temporary hooks, proper surface preparation is essential. Always clean your walls with rubbing alcohol before adhering to prevent dirt or oils from compromising the adhesive's effectiveness. For painted walls, it’s also crucial to wait at least a week after a fresh coat of paint before applying adhesive hooks. Careful Removal: The Key to Avoiding Wall Damage Removing temporary hooks can be where the most damage occurs if not done correctly. Whether using adhesive, suction, or magnetic hooks, patience is crucial. For adhesive hooks, gently pull straight down to stretch the adhesive. If you encounter resistance, using a hair dryer to warm the adhesive can help. Suction hooks should be pried gently from the edges, avoiding forceful tugs that can damage wall surfaces. Alternative Hanging Solutions: Beyond Temporary Hooks While temporary hooks are a great solution for renters and those seeking flexibility, they are not the only option. Other tools such as command strips and even damage-free picture hanging solutions may provide additional support for heavier items. Always consider the weight limits before using any of these solutions to avoid potential mishaps. Conclusion: Taking Action to Safeguard Your Walls Using temporary hooks does not have to be a risk when you are equipped with the right knowledge. By understanding how to choose the proper hook for your needs and following the correct application and removal procedures, you can decorate your home with confidence. Now that you are informed, take steps to prepare your walls properly and enjoy your decorations worry-free!

10.27.2025

Unlocking Zip Ties: A Game-Changing Hack for Homeowners

Update Unlocking the Versatility of Zip Ties Have you ever found yourself surrounded by a collection of zip ties at the end of a DIY project? Often, these handy tools are viewed as single-use items, tossed aside or cut off never to be used again. Yet, what many don’t realize is that zip ties can be reused, significantly reducing waste and saving you money over time. A Simple Yet Effective Hack Thanks to Scott McGillivray’s insights on Ask…Scott McGillivray, we now know that zip ties aren’t meant to be used just once. In a recent episode, he demonstrated a quick and easy method to unlock and reuse these valuable DIY staples. The process is remarkably simple: after securing your items, all you need is a flathead screwdriver or a paperclip. Gently press down on the tab inside the zip tie’s latch, and voilà! You’ve successfully “unlocked” the tie, allowing you to repurpose it whenever needed. Why Reusing Zip Ties Matters Beyond cost savings and sustainability, understanding how to unlock zip ties enhances your flexibility during projects. Perhaps you secured something incorrectly or realized you needed a longer tie. Instead of cutting it off, this hack allows for quick adjustments without the waste of a new tie. It’s a straightforward solution that opens the door to more efficient problem-solving in your DIY endeavors. Addressing Common Misconceptions Many DIY enthusiasts may assume that once a zip tie is secured, it’s locked in place forever. This unfamiliarity with their reusability leads to unnecessary wastage. By dispelling this myth, we not only save resources but also teach new DIYers a valuable skill that can bring ease to their projects. Utilizing this hack often means fewer trips to the hardware store and less clutter from unused zip ties floating around in your toolbox. Tips for Successful Reuse To make the most of this zip tie hack, keep a small flathead screwdriver or a paperclip handy in your toolbox. It's also beneficial to practice unlocking a few ties to get the hang of the technique; it’s even something the kids can learn! Furthermore, always consider the size and type of zip ties you choose for your projects, and remember that heavier duty ties often warrant more care when unlocking. A Brighter Future with Better Practices With awareness and an intention to reuse, we can all contribute to a more sustainable approach in our craft projects. This little hack changes the way we view zip ties and demonstrates how simple adjustments can lead to significant savings. So next time you reach for a zip tie, remember: with a little finesse, you can unlock a world of possibilities!

Terms of Service

Privacy Policy

Core Modal Title

Sorry, no results found

You Might Find These Articles Interesting

T
Please Check Your Email
We Will Be Following Up Shortly
*
*
*