Add Row
Add Element
cropper
update
Home Owners Vibes
update
Add Element
  • Home
  • Categories
    • interior
    • decor
    • inspiration
    • atmosphere
    • trends
    • design
    • comfort
    • Food & Travel
    • House Hold Tips & Ideas
    • home
    • Home Improvement Tips
    • Roofing & Exterior Maintenance
    • Interior Remodeling & Design
    • Budgeting & Financing for Home Projects
    • Hiring & Working with Contractors
    • Landscaping
    • Garden
    • Real Estate
April 16.2025
3 Minutes Read

Effective Strategies for Controlling Spurge Weeds in Your Lawn

Close-up of spurge weeds in dry soil, natural garden setting.

Understanding Spurge Weeds: The Unwanted Lawn Invaders

When it comes to maintaining a vibrant lawn, homeowners often face various challenges, with spurge weeds being one of the most persistent culprits. These hardy, invasive plants belong to the Euphorbia genus and are notorious for their resilience and rapid reproduction. As the warm spring breeze ushers in a new season of yard work, it's imperative to be aware of the telltale signs of spurge to prevent them from overtaking your lawn.

Identifying Spurge Weeds: Know Your Enemy

Spurge weeds are exceptionally distinctive. According to Julia Omelchenko, a botany expert, species such as the spotted spurge (*Euphorbia maculata*) and creeping spurge (*Euphorbia serpens*) are all part of this invasive family. These weeds thrive in poor, compacted soil and are particularly aggressive during summer months when the heat increases, making them more likely to sprout in sunny patches of gardens.

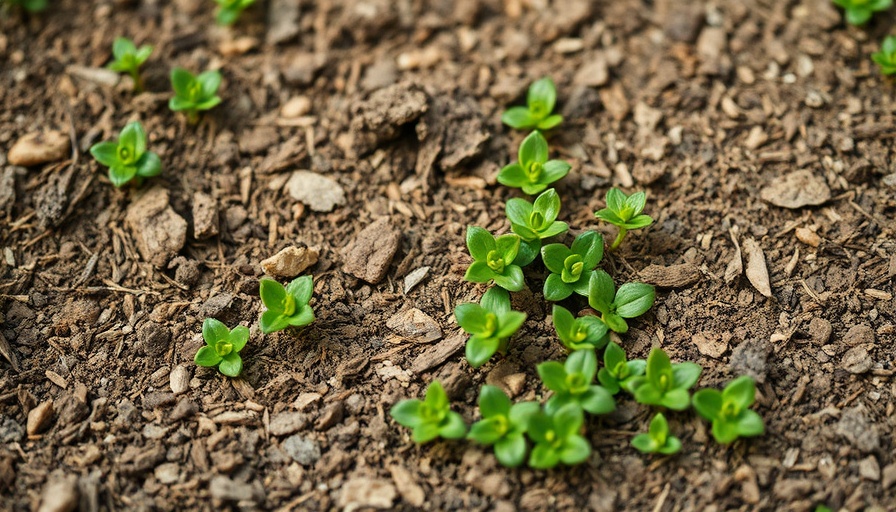
Visually, spurge weeds can be identified by their small, oval leaves arranged in a whorled pattern around their stems. Their leaves may take on a reddish tint as temperatures rise, and they often produce tiny green or pink flowers that can quickly develop into thousands of seeds. This ability to rapidly spread and adapt to different environments makes them a perennial headache for lawn enthusiasts.

Why Spurge Weeds Are a Problem

The true danger of spurge weeds lies in their aggressive growth habits. They tend to form thick mats that can smother desirable grass and other cultivated plants in your yard. As each spurge plant releases a milky white sap when damaged, it poses a risk not just to your plants, but also to pets and children who might accidentally come into contact with it.

Beyond the aesthetic concerns, homeowner frustration often leads to significant labor and financial costs as they seek effective weed control solutions. Failing to address a spurge problem can lead to a more extensive and difficult battle down the line.

Effective Strategies for Spurge Control

The good news is there are effective ways to combat these invasive weeds. Prevention is key—prioritize keeping your lawn healthy with proper watering and fertilization, which encourages grassy growth that can outcompete spurge. Early detection is crucial, as addressing spurge before it flowers can greatly reduce its capacity to spread.

For established patches of spurge, hand-pulling can be effective if done meticulously—make sure to remove the entire root system to prevent regrowth. If the infestation is extensive, consider using organic herbicides that target these resilient plants without harming your garden. Maintaining a healthy lawn through aeration and overseeding can significantly diminish spurge frequencies over time, encouraging a lush environment where they stand little chance.

Long-Term Solutions and Maintenance Tips

Adopting proactive strategies will save you time and energy in the long run. Regularly monitor your lawn for signs of spurge, especially as summer approaches, and take immediate action when spotted. The combination of proper lawn care practices along with diligent weeding can create a thriving outdoor space that’s both beautiful and functional.

With the right knowledge and tools at your disposal, homeowners can tackle spurge weeds effectively. Remember, the best defense against invaders starts with informed action and a commitment to maintaining a healthy, vibrant lawn—one that enhances your outdoor living experience for seasons to come!

If you’re looking to create a lush, weed-free oasis in your yard, consider consulting with a local lawn care professional for tailored advice. Taking proactive steps not only helps control spurge but also promotes the overall health of your garden.

Home Improvement Tips

6 Views

0 Comments

Write A Comment

*
*
Related Posts All Posts
02.12.2026

Winter Car Care Tips: When and How to Wash Your Car

Update The Importance of Winter Car Washing When winter weather descends, it brings with it not just snow and slush, but also road salt and de-icing chemicals that can wreak havoc on your vehicle. As such, understanding the right approach to winter car care becomes essential, especially for homeowners who want to prolong the life of their vehicles. Why Salt and Grime Are Your Car's Biggest Enemies Those who drive in snowy conditions know that road salt is often a necessary evil, creating safer driving conditions but leaving vehicles vulnerable to corrosion. Toronto car detailing expert Parham Koukia explains, "Salt and de-icing chemicals stick to every surface of the car, especially underneath. This accelerates paint damage and rust, particularly around areas like brake lines and suspension parts." In my own experience driving an aging vehicle through harsh winters, I can attest to just how damaging neglecting this seasonal chore can be. Timing is Everything: When to Wash According to multiple automotive specialists, washing your car shortly after winter storms—ideally one to three days afterward—can save you from costly repairs down the line. On especially cold days, you might not want to risk washing your car if temperatures remain below 32°F for extended periods. If there’s no commercial car wash facility nearby, it may be wise to hold off until conditions improve. Key Areas to Target During Winter Washes Certain areas of your vehicle need special attention during winter cleaning. Brake lines, suspension parts, and the undercarriage harbor salt and grime that are less likely to be rinsed clean by rain. These locations can become breeding grounds for rust if not properly managed. According to Luke Oswald, who specializes in scrap vehicle analysis, “Rust in these areas is one of the most common reasons cars lose their value.” Focus on wheels and wheel arches, as well, which attract salt and grit from tires. Best Practices for Washing in Cold Weather Experts recommend washing your vehicle on warmer days to minimize freezing risks. If you do need to wash in lower temperatures, opt for a self-serve car wash to avoid residual water freezing in crevices. Warm water works best: it effectively dissolves salt without risking thermal shock to your vehicle's surfaces. Some tips to follow include: Choose a day that is warm and above freezing. Utilize lukewarm water to avoid damaging your paint. Don't forget to rinse and dry areas like door jambs and the gas cap, as they can trap moisture and salt. Protecting Your Vehicle Post-Wash To further extend the lifespan of your car during winter, consider applying a protective wax or sealant. This forms a barrier between the elements and your paint, significantly reducing the chances of rust appearing. Moreover, always remember to treat your windows and tires; using products designed to repel water can significantly improve visibility and keep your driving experience safe. Quick Maintenance Tips: Stay Ahead of Corrosion In addition to regular washes, taking preventive measures can go a long way. Quick rinses on milder days can help remove built-up salt and moisture, focusing on the most vulnerable spots like the undercarriage and wheel wells. A touchless car wash can also be a great option, as they minimize the risk of freezing water in hard-to-reach places. As winter settles in, taking the initiative to care for your vehicle is not just about aesthetics; it’s a worthwhile investment in maintaining your car's safety and value. Investing a little time now can save you from bigger headaches—and repair bills—down the road. If you want to dive deeper into safeguarding your vehicle this winter, don’t hesitate to reach out to a local auto expert for more guidance!

02.11.2026

Why That Extension Cord on a Car’s Hood Means Winter Readiness

Update Understanding Engine Block Heaters: The Key to Cold Weather Survival If you've ever spotted an extension cord hanging from a car's hood, you might've wondered about its purpose. This is often a sign of an engine block heater—a device designed to help vehicles start in freezing conditions. Especially for diesel engines, where fuel and motor oil can quickly congeal, block heaters are essential tools for ensuring that your car remains reliable when temperatures plummet. The Science Behind Block Heaters Engine block heaters work by warming up either the coolant, motor oil, or the engine block itself. Utilizing a standard 120-volt outlet, they create a resistive heating circuit. This helps the fluids warm up, allowing them to flow more easily when the engine needs to start. Bud Mangin, an ASE and General Motors Master Technician, emphasizes how this process enhances the engine's ability to crank and function effectively even in harsh winter temperatures. Types of Block Heaters to Consider When it comes to engine block heaters, there are several options available to homeowners. Here are a few types to consider: Freeze Plug Heaters: These are the most effective, installed in place of a freeze plug to heat coolant directly from inside the block. Oil Pan Heaters: These attach directly to the oil pan and keep the oil warm, improving lubrication when starting. In-Line Coolant Heaters: Inserted into a heater hose, these quickly warm up and help circulate heated coolant through the engine. Dipstick Heaters: While they are easier to install, they are the least effective as they only warm the engine oil. Battery Warmers: Though not fully block heaters, they keep the battery warm and improve cranking power in extreme cold. The Benefits of Using Block Heaters The use of block heaters comes with several advantages, particularly in regions with frigid winters: They reduce wear on the starter, battery, and internal engine components, leading to a longer lifespan for your vehicle. They improve cold-start performance, particularly critical for diesel engines. Warm engine fluids aid in faster heating of the passenger compartment, making your car more comfortable in cold weather. Taking Action: Best Practices for Installation and Use If you're a homeowner interested in installing a block heater, consider these tips: Assess which type of block heater suits your vehicle best based on your location and engine type. For DIY enthusiasts, many types can be installed easily. However, complex installations, like freeze plug heaters, are often best left to professionals. Regularly check the condition of your block heater and extension cord to ensure safe operation. Wrapping It Up: Staying Prepared in the Cold Understanding the role and functionalities of engine block heaters can make a significant difference in winter driving experiences. As a homeowner, being proactive about such tools can ensure that your vehicle remains dependable through the cold months ahead. So, the next time you see that extension cord, you'll know it's a lifeline to a smoothly running engine!

02.09.2026

Effective Techniques to Remove Paint from Tile Surfaces Easily

Update Quick Solutions for Removing Paint from Tile It’s common for paint to accidentally splatter on tile surfaces during renovations or DIY projects, leaving homeowners frustrated. Fortunately, removing paint from tile doesn’t have to be a daunting task. Here are some practical solutions that anyone can follow with ease and confidence. Understanding Your Paint Type: Why It Matters The first step in tackling paint stains on tile is to identify the type of paint involved. Latex paints are generally easier to remove than oil-based paints. According to painting expert Carr Lanphier, using water-based paints can save you a lot of hassle, as they respond well to simple cleaning methods. In contrast, oil-based paints often require more vigorous techniques and specific solvents for effective removal. Power of Warm Water and Soap One of the simplest methods to remove paint splatters is to soak the area with warm water mixed with soap. As Anthony Kulikowski, a professional painter, suggests, soaking helps assess how easily the paint will come off. If the paint is still wet or just dried, it may lift off with minimal scrubbing using a soft cloth or sponge. Always remember to wipe away any wet paint immediately to prevent it from adhering too strongly. Using White Vinegar: A Household Hero For latex paints, heated white vinegar can be incredibly effective. Its acidic nature helps break down paint binding agents without damaging the tile itself. Simply soak a cloth in warm vinegar, place it on the painted area, and let it sit for a few minutes before wiping it away. This method is not only practical but also environmentally friendly and safe for any household. Power Tools: Xylene and Other Solvents If the paint is stubborn or oil-based, commercial products such as Xylene can be a game changer. Master tiler Jeff Thacker swears by it; just apply it to a cloth and wipe. However, keep in mind that safety comes first: always wear a mask and ensure proper ventilation before using solvents. For extra stubborn paint, try specialized cleaners like Goof Off or rubbing alcohol, but always spot-test in an inconspicuous area first to avoid damaging the tile finish. Hard Scraping: When and How For fresh paint drips or thin layers of paint, a plastic putty knife or a specially designed tile scraper can be effective. Best practices suggest soaking the area with warm soapy water for several minutes before gently scraping to prevent tile chipping. Matthew Rathgeb, a seasoned painter, advises wrapping a cloth around the scraper to minimize scratches and protect the tile glaze. Heat Method: Softening Paint for Easy Removal Sometimes, the best solution involves the application of heat. A hair dryer or heat gun can soften the paint, making it easier to scrape off. But use caution—heat can damage grout or tile if not applied properly. If you use heat, remember to keep the tool moving to avoid scorching the tiles. Conclusion: Keeping Your Tile Looking New Ultimately, the right method for removing paint from tile will depend on the type of paint, its condition, and the tile material itself. From warm soapy water to more robust cleaning agents, homeowners have plenty of options that don't compromise their tile’s integrity. With these tips, you can maintain a clean and beautiful tile surface despite the occasional painting mishap. Don't let paint splatters give you a headache; just follow these steps for a clean and shining finish!

Terms of Service

Privacy Policy

Core Modal Title

Sorry, no results found

You Might Find These Articles Interesting

T
Please Check Your Email
We Will Be Following Up Shortly
*
*
*