Add Row
Add Element
cropper
update
Home Owners Vibes
update
Add Element
  • Home
  • Categories
    • interior
    • decor
    • inspiration
    • atmosphere
    • trends
    • design
    • comfort
    • Food & Travel
    • House Hold Tips & Ideas
    • home
    • Home Improvement Tips
    • Roofing & Exterior Maintenance
    • Interior Remodeling & Design
    • Budgeting & Financing for Home Projects
    • Hiring & Working with Contractors
    • Landscaping
    • Garden
    • Real Estate
June 01.2025
2 Minutes Read

Mastering Rhubarb Harvesting: The Ultimate Homeowner Guide

Rhubarb plant with vibrant leaves in garden bed.

Unleashing the Potential of Your Rhubarb Garden

For many homeowners, incorporating rhubarb into their gardens is a delightful choice, offering both aesthetic appeal and culinary potential. This perennial vegetable not only flourishes in cooler climates but promises repeat harvests for over a decade when cared for properly. By following expert advice on when and how to harvest rhubarb, you can ensure a thriving plant healthily producing well into the future.

Key Timing for Harvesting Rhubarb

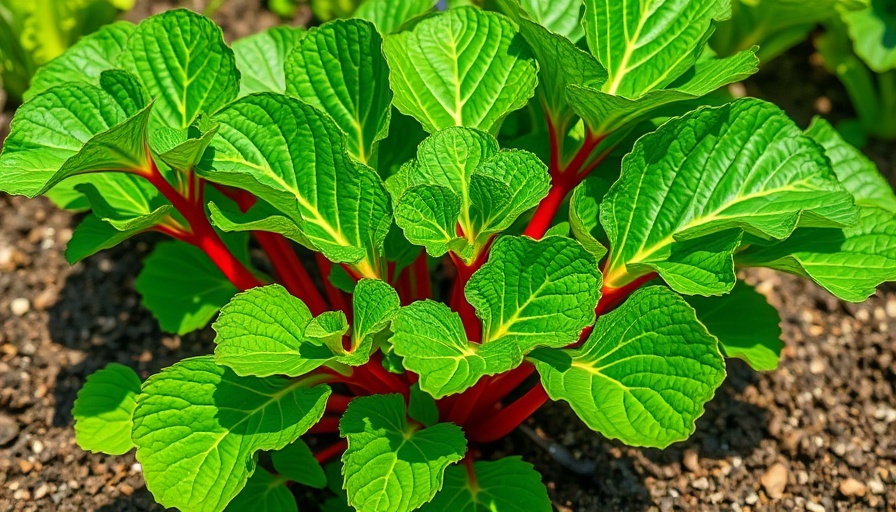
The secret to the best rhubarb yield begins with patience. New plants need time to establish themselves, so hold off on harvesting if your rhubarb is less than three years old. Laura Irish-Hanson from the University of Minnesota Extension emphasizes waiting until the plant reaches maturity to maximize yield. Typically, this means you're looking to pick rhubarb with leaves that are around 18 to 24 inches wide, signaling it's ready for harvesting.

Harvesting Technique: The Right Way To Do It

When it comes to actually harvesting rhubarb, ditch the scissors or pruners. Instead, use your hands for a gentler approach. By gripping the base of the stalk—known as the petiole—and twisting, you minimize damage to the plant. This method keeps the crown intact and healthy, safeguarding it against disease and ensuring future productions remain bountiful. As you pull away the stalks, remember to promptly chop off the poisonous leaves and dispose of them safely.

Best Practices for a Healthy Rhubarb Plant

It's essential to establish some rules for efficient rhubarb harvesting. Firstly, avoid harvesting during the summer months. Stalks tend to become tougher and less desirable once the heat sets in. Secondly, aim to take only a third to a half of the stalks at any given time. Allowing at least 50% of the plant to remain untouched helps foster ongoing growth and vitality.

Future Trends in Home Gardening

As sustainability grows in importance for homeowners, perennial vegetables like rhubarb are gaining renewed interest. Their durability and minimal care requirements fit seamlessly into the trend toward self-sustaining gardens. Homeowners are exploring sustainable choices that benefit not only their personal health but also the environment. Implementing best practices in rhubarb cultivation aligns perfectly with these values.

Rhubarb Beyond the Garden: A Culinary Delight

Once you've harvested your rhubarb, the fun has just begun. Its unique tart flavor opens the door to various recipes, from classic pies to innovative sauces. Home cooks are discovering the versatility of rhubarb in both sweet and savory dishes, showcasing its potential beyond traditional uses. This multifaceted vegetable not only enriches your garden but can also spice up your family meals.

Rhubarb represents an eco-friendly choice for those looking to enhance their home gardening journey while enjoying scrumptious homemade dishes. Explore the potential of your garden by embracing the art of rhubarb harvesting, and reap the benefits for years to come!

Take action today! Start maximizing your rhubarb harvest by incorporating these expert tips into your gardening routine. Experience the delicious rewards every season.

Home Improvement Tips

5 Views

0 Comments

Write A Comment

*
*
Related Posts All Posts
10.19.2025

Transform Your Holiday Decor with This Pool Noodle Hack!

Update The Ingenious Pool Noodle Hack for Holiday CheerWith the holiday season fast approaching, many homeowners are on the lookout for festive and creative ways to spruce up their living spaces without causing damage. Enter the pool noodle, a simple yet versatile household item that can be transformed into a stunning fireplace decoration. Thanks to TikTok user @craftybudgetqueen, this ingenious hack not only beautifies your mantel but also ensures it's damage-free! Here’s how to create a festive focal point that will impress your guests and light up the holiday spirit.How to Create a Damage-Free Holiday MantelThe process begins with a basic pool noodle: an affordable and easily accessible material perfect for this holiday project. Start by cutting your pool noodle to the desired length and slicing it open. This will allow you to fit it snugly over the edge of your mantel without leaving unsightly marks or residue. Make evenly spaced vertical cuts along the noodle to create slots for inserting decorative stems; this is where the magic happens!Once your noodle is securely in place, you can begin adding beautiful decorations. Fake evergreen garlands work wonderfully; their flexible branches can create elegant swoops across the mantel. To add color and texture, insert faux poinsettias to hide the pool noodle while giving your décor a rich, vibrant look. Fill in any gaps with faux holly berries and white berries to achieve a layering effect that captures the eye.Adding the Finishing TouchesThe final addition for a glowing ambiance involves adding tea lights to the flutes you've created. If you're worried about fire hazards, consider using electric tea lights or filling the flutes with sparkly red and white beads instead. This way, you can enjoy the flickering candlelight while keeping safety in mind. The combination of floral elements and gentle lighting creates a warm, inviting atmosphere that embodies the spirit of the holidays.Why This Hack is Perfect for Every HomeThis pool noodle hack is not only practical but also offers a creative outlet for homeowners who love to decorate without the clutter of permanent fixtures. The very nature of this design allows for easy modifications, whether you want to switch out colors or styles for different occasions. Importantly, this approach to decorating caters to the eco-conscious mindset many are adopting, as it involves repurposing everyday items into holiday decor.Explore More Decoration IdeasWhile the pool noodle hack is fantastic, there are other budget-friendly alternatives worth considering for holiday decoration. Florist foam could serve as a base, but it may not offer the same stability as a noodle. Ready-to-use garlands with built-in lights provide a hassle-free solution if you prefer a more straightforward approach. Ultimately, the goal is to create a pleasing atmosphere that feels festive without overwhelming your living space.Embrace Your Creativity!As you dive into your holiday preparations, remember that your home is a canvas for expressing joy and warmth. These simple decoration hacks not only enhance your space but also reflect your personal style. So grab a pool noodle, unleash your creativity, and transform your mantel into your holiday masterpiece!Are you ready to give your home a festive touch this holiday season? Try out the pool noodle hack and share your unique designs online!

10.18.2025

Transform Your Entryway with a Custom Hall Tree Build

Update Transform Your Entryway: Build the Dream Hall Tree Your entryway sets the tone for your home, and incorporating an entryway hall tree not only elevates the style but also enhances functionality. A hall tree, which typically combines a coat rack, bench, and storage, can redefine daily routines, allowing for a clutter-free space where shoes, backpacks, and coats have designated places. Imagine entering your home and immediately feeling a sense of order! This article will illuminate how to create your own stylish hall tree tailored to your unique décor. The Benefits of a Customized Hall Tree Building your own hall tree allows for personalization that store-bought options simply can’t provide. Many pre-made hall trees start at around $500, and even those may not fit perfectly in your space. With DIY, you maintain control over the dimensions, materials, and design aesthetics, tailoring it to blend seamlessly with your existing interior. From rustic farmhouse to contemporary minimalism, your hall tree can uniquely reflect your style. DIY Project Planning: Key Considerations Before diving into construction, careful planning is essential. First, measure your entryway and decide the optimal dimensions for both style and functionality. As highlighted in reference articles, choosing the right wood type according to your skill level and budget is pivotal: softwoods like pine are forgiving for novices, while hardwoods such as oak lend a more polished finish. Additionally, be sure to sketch out your designs, plotting in storage options, bench depth, and height. Essential Tools for the Build Gathering the right tools can be the difference between a successful project and a frustrating one. You will need the basics like a measuring tape, circular saw, and drill. Notably, having a miter saw and a pocket hole jig can greatly simplify the construction process, allowing for precise cuts and strong joints. Check out specialty stores or borrow from friends if you lack certain tools. Step-by-Step Guide to Your Hall Tree Let’s delve into building your hall tree! Begin by constructing the base and connecting it securely with pocket holes. Assemble the cabinet, carefully following the plans to ensure each component fits perfectly. Paying attention to detail will go a long way – ensuring that everything is square and properly aligned will save you a headache later. It’s here that you can infuse creativity: add a cushioned seat for comfort, decorative hooks, or cubbies for shoe storage. Common Mistakes to Avoid Even seasoned DIYers can overlook critical steps. One common hiccup is forgetting to adjust for space limitations; consider your ceiling height and floor clearance before installation. Another issue is using shortcuts during assembly or skipping measurements – this typically leads to more trips to the craft store and added costs. Proper preparation and a willingness to tackle adjustments as needed are key to a satisfying project. Maintaining Your Hall Tree for Longevity Once you’ve built this beautiful addition to your home, it’s important to maintain it. Regularly clean with a damp cloth, and keep an eye on the hooks and joints for wear and tear. Over time, you may want to reapply polish or repaint to keep it looking sharp. Embrace the evolution of your hall tree; as your style changes, so too can your organization methods. Inspiration for Future Projects Creating your own hall tree can ignite the DIY spirit in you, leading to even more home projects. Whether it’s matching benches in your mudroom or incorporating clever storage solutions throughout your house, the skills you gain from this project will empower you to tackle anything. From simple refinishing to larger scale builds, let your creativity flow! Ready to embark on your hall tree journey? Measure your space, gather your tools, and let your imagination guide you. Remember, even small mistakes are part of the learning curve, and each step brings you closer to a functional masterpiece!

10.17.2025

Why Making a U-Turn on the Highway is Not a Safe Move

Update Understanding the Danger of U-Turns on HighwaysMissing an exit while driving can turn a simple road trip into a frustrating ordeal. As tempting as it may be to think about making a U-turn on the highway to reclaim that missed route, it’s essential to understand the potential safety risks and legality of this maneuver. Highways are designed for high-speed travel, and attempting to navigate them incorrectly can lead to severe traffic accidents.Legal Implications of Highway U-TurnsThe legality of making a U-turn on a highway can vary by location. While some highways display clear signage indicating that U-turns are prohibited, many do not. Regardless of signage, these turnaround lanes are intended solely for emergency service vehicles such as police cars, ambulances, and highway maintenance crews. In fact, the Wisconsin State Patrol has reiterated the importance of adhering to these laws after hearing about tragic incidents involving unauthorized U-turns.Colorado State Patrol further emphasizes that using these turnarounds can create enormous risks—not just for you but for all drivers on the highway. Cars entering traffic unexpectedly can lead to collisions, and as highlighted in a prior tragedy reported by local news, using these areas in adverse weather conditions can be particularly dangerous. The unmaintained surface, combined with approaching vehicles at high speed, increases the risk of accidents exponentially.Safer Alternatives to ConsiderIf you miss your exit, the best course of action is to remain calm and take the nearest available exit. While it may take a few extra minutes to reorient yourself, entering the highway from the correct access point is significantly safer than trying to make a U-turn. Many drivers have had this experience, and they often find that accepting a slight detour leads them back to their desired route without incident.Consequences of Making Illegal U-TurnsIn addition to the obvious dangers, attempting to make a U-turn on the highway can lead to legal ramifications. Being caught engaging in this behavior can result in hefty fines, points added to your driving record, and even increased insurance rates. The small inconvenience of taking an extra few minutes on your journey is far better than dealing with these potential penalties.The Bigger Picture: Road Safety and ResponsibilityDriving is a responsibility, and part of that involves adhering to the rules designed to keep everyone safe. Just as you wouldn’t ignore a stop sign, safely negotiating exits and entry points on highways is equally important. Consider how your actions could not only affect you but also the multitude of drivers sharing the road with you. Making responsible decisions is crucial for promoting a safer highway environment.In summary, while it may be tempting to make a U-turn on the highway after missing an exit, the risks far outweigh the benefits. Maintain patience, take the proper route, and prioritize safety on the roads.For further insights into driving safety and tips for managing travel inconveniences, stay informed and remember that our safety always comes first.

Terms of Service

Privacy Policy

Core Modal Title

Sorry, no results found

You Might Find These Articles Interesting

T
Please Check Your Email
We Will Be Following Up Shortly
*
*
*