 Add Row
  Add
Add 


Mastering Drywall Repairs: A Homeowner's Essential Guide
Learning how to repair a hole in drywall might seem daunting, but with a few tools and the right technique, any homeowner can restore the beauty of their walls. This quick guide will walk you through a simple yet effective process to tackle small drywall imperfections in your home.
Why Drywall Maintenance Matters
Drywall is a standard material used in most homes due to its affordability and ease of installation. However, it’s susceptible to damage from various sources—kids bouncing balls, furniture knocks, or even overzealous vacuuming. Addressing these small damages not only enhances the aesthetics of your space but prevents potential issues from escalating into larger repairs.
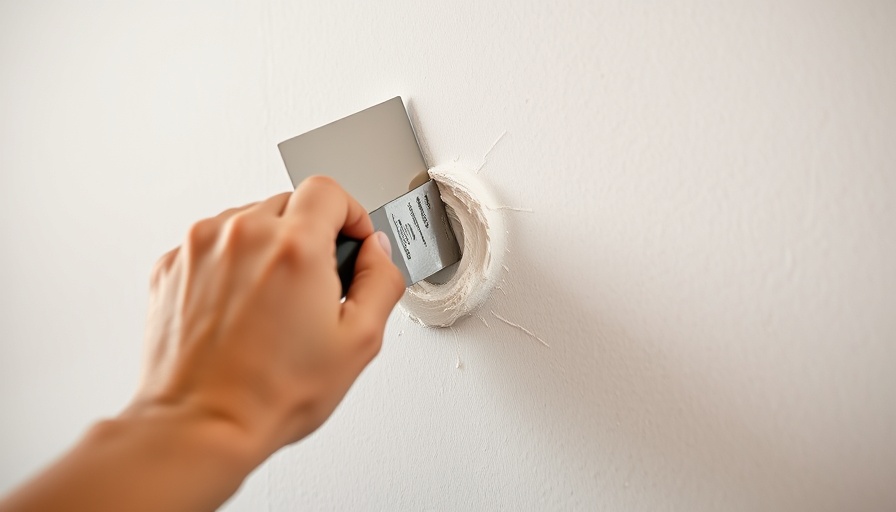
The Right Tools for the Job
Before diving into the repair, ensure you have the right tools at hand. You’ll need:
- Fine-grit sanding sponge or a putty knife
- Spackle or drywall compound
- Clean rags to remove dust
- A work light to illuminate the area
- A paintbrush for the finishing touch
Using high-quality materials will yield better results, making your repairs virtually invisible.
Step-by-Step: Fixing Drywall Holes
Follow these straightforward steps to fix small holes in your drywall:
- Turn On Your Work Light: Illuminate the area you plan to repair. This helps highlight imperfections that may not be visible in natural light.
- Sand Down the Area: Use a fine-grit sanding sponge or putty knife to smooth the edges of the hole. This step ensures better adhesion for the spackle.
- Clean the Dust: Once you've sanded, wipe down the area with a damp rag to remove any dust. Allow it to dry thoroughly.
- Apply Spackle: Using a putty knife, apply a layer of spackle evenly over the hole. Ensure it fills the space completely.
- Wait for It to Dry: Depending on temperature and humidity, drying times can vary. Generally, allow it to dry for at least one hour.
- Sand and Paint: Once dry, sand the area for a smooth finish and then touch up with matching paint.
By following these six simple steps, you can achieve professional-looking results in under two hours—a confidence boost for any DIY enthusiast!
Visual Aids: The Importance of Proper Lighting
Utilizing a work light not only helps see smaller imperfections but also aids in creating a better finish post-repair. Many homeowners may overlook the significance of proper lighting during home improvement tasks. An illuminated workspace can drastically change the quality of your end result and save you from missed spots that lead to further issues down the line.
Eco-Friendly Thoughts on Home Repairs
As we become more conscious of our environment, home repairs should also embrace sustainable practices. Opt for eco-friendly spackling compounds that reduce volatile organic compounds (VOCs) in your home. These products are better for your health and the planet, setting a positive precedent when it comes to maintenance.
Now that you are equipped with the knowledge and tools needed for drywall repairs, don't let small imperfections hold you back from achieving a beautiful living space. Take action today and implement these tips!


Write A Comment