Add Row
Add Element
cropper
update
Home Owners Vibes
update
Add Element
  • Home
  • Categories
    • interior
    • decor
    • inspiration
    • atmosphere
    • trends
    • design
    • comfort
    • Food & Travel
    • House Hold Tips & Ideas
    • home
    • Home Improvement Tips
    • Roofing & Exterior Maintenance
    • Interior Remodeling & Design
    • Budgeting & Financing for Home Projects
    • Hiring & Working with Contractors
    • Landscaping
    • Garden
    • Real Estate
July 01.2025
3 Minutes Read

Essential Tips for Stress-Free July 4th Cookouts This Year

Feeding a Crowd on July 4th: vibrant backyard barbecue scene.

Make Your July 4th Gathering Unforgettable

Independence Day is nearly upon us, bringing with it the delightful chaos of barbecues and family gatherings. If you’re concerned about how to feed a larger crowd this year, there’s good news: we’ve got your back! Planning a cookout on July 4th can definitely feel daunting, but with a bit of organization and strategic menu planning, you can create a memorable and stress-free day for you and your guests.

Start with a Solid Game Plan

Before you fire up the grill, take a moment to assess how many people you really can accommodate. Factors like parking, seating, and bathroom facilities may influence your planning significantly. If your home can’t handle the expected crowd, consider renting extra equipment like grills or tables. Neighborhood supply stores are treasure troves for inexpensive party goods, ranging from disposable dinnerware to large serving trays. Also, don't hesitate to enlist the help of your friends or family for setup and entertainment. This way, everyone shares in the fun!

Simplify Your Menu for Maximum Impact

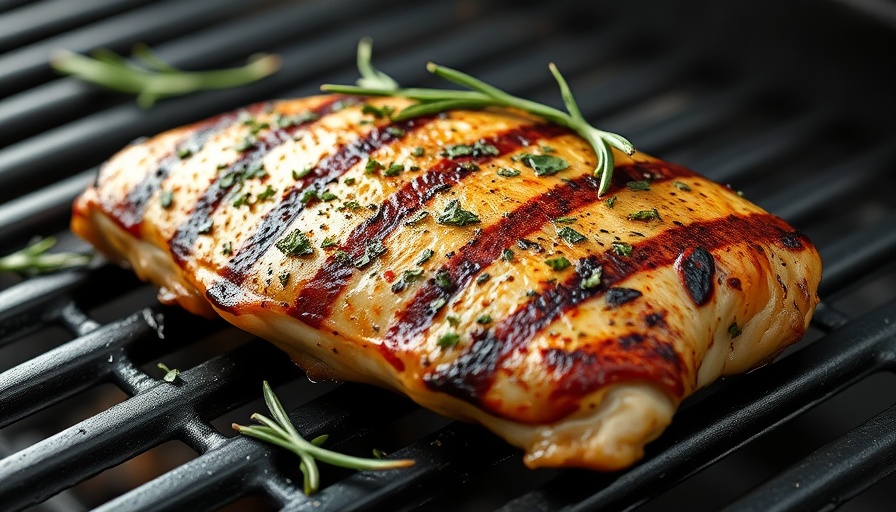
Preparing unique, delicious selections is essential, but keeping it simple will ease the burden. Instead of an overwhelming array of dishes, stick to one or two standout protein options. Pulled pork is ideal because it can be made ahead and reheated, providing a comforting and crowd-pleasing flavor. Consider chicken thighs for a reliable, economical option or showcase some tasty vegetarian skewers for plant-based friends. Remember to think of the kids—serve hot dogs alongside the other main courses!

Organize and Execute with Efficiency

Organization is key to a successful barbecue. Start by setting up a designated food prep area with all essential supplies within arm’s reach—think heavy-duty foil, grill gloves, and your favorite spices. This setup, often referred to as mise en place, will prevent frantic trips to the kitchen in the middle of the chaos. Don’t forget safety; having a fire extinguisher nearby isn’t just smart—it’s also impressive!

Facilitate a Smooth Buffet Experience

Create a seamless self-serve buffet to keep guests happy and relaxed. Arrange the drinks station separately from food to minimize congestion, and make sure plates and utensils are easy to access. Lay the food out in an orderly fashion to encourage flow: buns, followed by proteins, side dishes, and finally, condiments. As your guests enjoy their meals, clear away any empty dishes promptly to keep the area looking inviting.

Find Joy in the Celebration

Finally, remember that the magic of July 4th lies in the joyful atmosphere you create. Your guests are there to enjoy good food and each other's company. Embrace the moment, let go of perfectionism, and focus on having a great time together. This holiday isn’t just about the food; it’s about connection, laughter, and shared memories.

By following these straightforward tips, you can successfully cater to your crowd this Independence Day and enjoy a beautiful summer evening filled with delicious food and wonderful company. Keeping things organized and simple will allow you to focus on what truly matters—making memories with your loved ones!

Food & Travel

1 Views

0 Comments

Write A Comment

*
*
Related Posts All Posts
08.16.2025

Discover the Two-Minute Brisket: Quick, Delicious BBQ At Home!

Update Revolutionizing Brisket: A New Fast-Cooking Technique For years, brisket has been synonymous with slow cooking. Enthusiasts have embraced the philosophy that low and slow is the way to achieve the ultimate tenderness and flavor. Traditionally, a full packer brisket can take hours, sometimes even a day, to cook to perfection. But emerging culinary techniques from around the world are challenging this dogma, introducing innovative ways to enjoy brisket without all the waiting. Unpacking the Two-Minute Brisket Imagine serving up tender, flavorful brisket in just two minutes—sounds too good to be true, right? At New York's Baekjeong KBBQ restaurant, a culinary masterpiece is unveiled: thinly sliced frozen brisket, cooked directly over high heat. This technique eliminates the lengthy cooking time while still capturing the essential flavors of traditional brisket. The result? A dish that’s reminiscent of steak yet uniquely its own, offering a delightful tenderness akin to filet mignon. The Magic of Slicing: Tools and Techniques The secret to this quick-cooking brisket is all in the slicing. Using an electric meat slicer, chefs can create paper-thin cuts of brisket that cook in a flash. For those without access to such fancy equipment, a food processor or even sharp knives will do—provided the meat is frozen just enough to allow for manageable slicing. This approach not only speeds up cooking but also enhances the overall dining experience. Korean BBQ and Brisket: A Flavorful Connection The ability to rapidly cook brisket is not just about time; it’s about flavor. Traditional Korean BBQ employs a variety of sauces and side dishes, known as panchan, that elevate the meat to a spectacular level. Wrapping grilled brisket in lettuce and pairing it with vibrant condiments creates a meal that feels both indulgent and health-conscious. Think of it as a barbecue experience redefined—a mix of comfort food and fitness in every bite! Brisket: A Modern Twist on a Classic Dish This two-minute cooked brisket opens doors to new culinary philosophies. Homeowners, well-versed in eating brisket as a hearty weekend meal, can now incorporate this deliciousness into busy weekdays. This reimagined dish reflects a growing trend in the food landscape—where time constraints don’t have to compromise flavor. Brisket in Your Kitchen: What You Need to Know Intrigued about the experience? Start by preparing your brisket properly: freeze it to achieve that perfect thinness, and have your condiments ready! With just a few ingredients and a hot grill, you’ll be able to serve up this remarkable two-minute brisket that wows your guests and potentially becomes a staple in your culinary repertoire. As we embrace new trends, it's essential to keep the spirit of cooking intact. This two-minute brisket method might just be the next big thing, allowing you to savor every bite while keeping your mealtime exciting and guilt-free.

08.13.2025

Discover the 3-1-1 Ribs Method: Elevate Your BBQ Skills Today

Update Breaking Down the 3-1-1 Method: A Guide to Perfect Ribs The debate around the best way to cook ribs is an age-old one, igniting passion and creativity among backyard chefs everywhere. The popular 3-2-1 method— wherein ribs are smoked for three hours, wrapped in foil for two, and then unwrapped for one final hour—has long been revered for its deliciously tender results. But what if there was a better method to enhance flavor and texture without sacrificing moisture? Enter the 3-1-1 method, a subtle yet effective adaptation to refine your rib cooking technique! Why Switch from 3-2-1 to 3-1-1? Despite its popularity, the traditional 3-2-1 method tends to produce ribs that can veer towards mushiness. The lengthy time spent wrapped in foil can suffocate the bark, resulting in muted flavors and a lackluster texture. By opting for a 3-1-1 approach, as highlighted by famed chef Steven Raichlen, you can maintain a crispier bark and ensure the flavors of your rub and smoke penetrate the meat more effectively. The Perfect Rib Recipe: Step-by-Step Guidance Ready to step into the smoking game? Here’s a step-by-step guide to mastering the 3-1-1 method: Choose Quality Ribs: Opt for St. Louis-style or heritage breed spare ribs for superior results. Make sure they are fresh and never frozen. Prep Them Right: Remove the papery membrane to help flavor absorption and apply a balanced rub, giving it at least an hour to infuse. Set Up and Smoke: Preheat your grill or smoker to 250°F. Place the ribs bone side down and let them smoke for the full 3 hours. Wrap It Up: After smoking, wrap the ribs in aluminum foil, adding a splash of your choice of liquid (apple cider, beer, etc.) for added zing. Finish with a Crunch: Unwrap them after another hour, then put them back on the grill for a final hour of cooking to develop that glorious bark. The Aroma of Success: Enhancing the BBQ Experience Cooking ribs isn’t just about following a technique; it’s about creating an experience. As the delicious aroma of smokey meat fills your backyard, it's a reminder that cooking involves community and sharing. Whether you’re hosting a family gathering or a small BBQ with close friends, the anticipation around perfectly cooked ribs can turn any meal into a feast. Prepare accordingly and encourage loved ones to help with the preparation; it's a great way to bond while enjoying delicious food! Health Considerations: Enjoying BBQ Responsibly While savoring those smoky ribs, it’s essential to keep in mind the value of moderation and balance in our diets. Integrating healthier sides like grilled vegetables or a fresh coleslaw can complement your meal and balance nutritional intake, promoting a holistic approach to enjoying BBQ. Final Thoughts: BBQ Beyond the 3-2-1 Math The art of BBQ, like any culinary pursuit, evolves over time as we learn from champions and champions like Raichlen. The shift from the 3-2-1 method to a 3-1-1 method reflects the beauty of adaptability and exploration within cooking. So, embrace the change, grab your smoker, and let your ribs shine! If you’re eager to refine your BBQ skills and connect with fellow enthusiasts, consider diving deeper into rib smoking techniques or joining a local BBQ class to share knowledge and experiences.

08.09.2025

Unlock the Secrets: 9 Techniques for Grilling Moist Chicken Breast

Update Grilling Secrets to Perfectly Juicy Chicken Breast Grilling can be a tricky yet satisfying way to cook chicken breast, but many home cooks struggle with achieving that elusive moist and tender result. Whether you’re planning a backyard BBQ or a quiet dinner at home, eliminating dry chicken from your menu is paramount. Here are some strategies that can make your grilled chicken the star of your next meal. Understanding the Challenge of Grilling Chicken Boneless, skinless chicken breasts are notorious for drying out during grilling. This is largely due to their low-fat content, making them susceptible to overcooking. What’s more, uneven thickness can lead to uneven cooking—a common pitfall for many grillers. Noticing this frequent complaint from both amateur and experienced cooks sheds light on the importance of preparation and technique. 1. Mastering the Preparation: Pounding and Trimming One of the key steps in achieving tender chicken breast involves some basic preparation. Start by trimming any loose pieces, known as tenders, from the underside of the breast. This creates a more uniform thickness, allowing for even cooking. Next, use a meat mallet to pound the chicken to an even thickness, ensuring that the breast cooks uniformly on the grill. This method of preparation not only enhances tenderness but also takes very little time, ensuring your meal is ready in a snap! 2. Perfect Temperature: Keep An Eye on the Grill Grilling requires attention, especially when you're working with lean cuts. It's crucial to monitor the grill’s temperature and the internal temperature of the chicken. Aim for a grill temperature of around 400 degrees Fahrenheit and use a meat thermometer to gauge doneness, pulling the chicken off the grill when it reaches 160 degrees. Resting it for a few minutes allows the juices to redistribute, ensuring a moist bite every time. 3. Brining Magic: Elevating Flavor and Texture Another great technique is brining. Soaking your chicken breast in a saltwater solution not only enhances flavor but also improves moisture retention. Brine your chicken for a minimum of one hour, or overnight for best results. This simple yet effective step can transform your chicken from bland and dry to flavorful and succulent. If experimenting with brining, just be cautious not to over-salt your chicken before cooking it! 4. Experiment with “Velveting” Technique For a brilliantly tender chicken, consider using the velveting technique popular in Chinese cooking. This involves tossing your chicken with baking soda before cooking. The baking soda helps to create a silky, tender texture when grilled. Although it might not be the first method that comes to mind for grilling, this technique can elevate the juiciness of your chicken and surprise your family or guests. 5. Learn About Basting and Saucing As you approach the end of your cooking time, remember to baste your chicken with melted butter or oil to boost juiciness and flavor. Avoid sugary sauces until the final moments to prevent burning and stickiness. Finding a balance with flavorful ingredients can enhance not only the taste but the appearance of your meal, leaving it glistening and inviting. Incorporating Your Grilling Skills Beyond Just Chicken These techniques not only apply to chicken breast but can be expanded to other meats and even vegetables. Grilling effectively is about understanding heat, moisture, and time—elements that resonate through many cooking practices. Crafting the perfect meal requires a mindset of experimentation and learning; don't hesitate to bring your culinary creativity to life each time you fire up the grill. Call to Action: Ignite Your Grilling Adventure! Ready to make your next grilled chicken experience unforgettable? Equip yourself with these strategies, invite your friends over, and experience the joy of serving perfectly grilled chicken every time. Happy grilling!

Terms of Service

Privacy Policy

Core Modal Title

Sorry, no results found

You Might Find These Articles Interesting

T
Please Check Your Email
We Will Be Following Up Shortly
*
*
*