 Add Row
  Add
Add 


Why Grout Repair is Essential for Homeowners
Grout, the unsung hero of your tiled surfaces, is crucial for maintaining the beauty and integrity of your home. As a homeowner, you know that maintaining your property involves a variety of tasks, but often, grout repair is overlooked until it becomes a significant issue. Cracked or stained grout not only diminishes the aesthetic appeal of your bathrooms and kitchens but can also lead to more severe damage, such as mold growth or water seepage.
Understanding Your Grout Type
Before diving into repair, it’s crucial to understand the type of grout you’re dealing with. Most residential tiles use either cement-based or epoxy grout. Cement-based grout is porous and can stain easily, while epoxy grout is more durable and resistant to stains and moisture. Knowing your grout type will help determine the best repair methods and products to use.
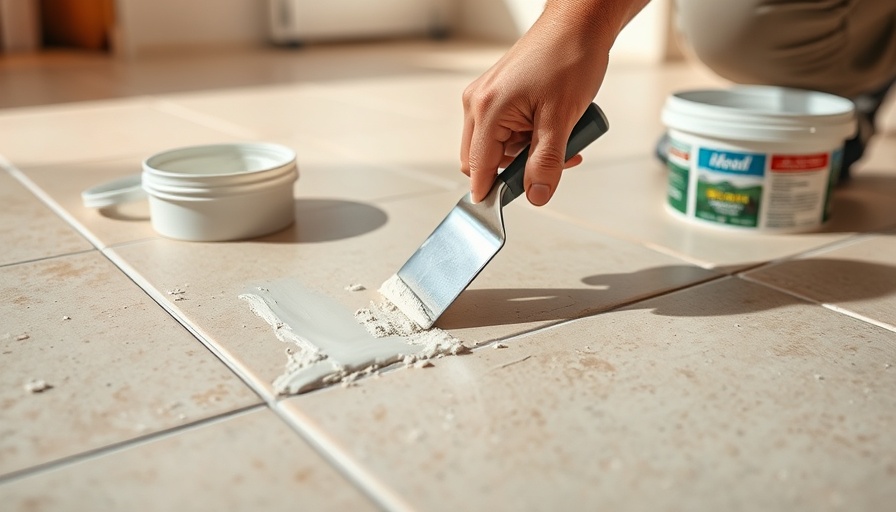
Step-by-Step Guide to Grout Repair
Here’s a simple, effective guide to help you revitalize your tiled surfaces:
- Assess the Damage: Begin by inspecting your grout. Look for cracks, stains, or areas where moisture may have penetrated. This assessment will inform your repair strategy.
- Gather Your Materials: You will need a grout saw or utility knife, new grout, a grout float, a sponge, and appropriate cleaning products for the area.
- Remove Old Grout: Use a grout saw to carefully remove damaged grout. Be cautious not to chip the tile itself.
- Clean the Tile: Once the old grout is removed, clean the area thoroughly to remove dust and debris.
- Apply New Grout: Using a grout float, apply the new grout, ensuring it fills all gaps evenly. Work in small sections to prevent the grout from drying before you can smooth it out.
- Smooth and Clean: After applying, use a damp sponge to remove excess grout from the tile surface, smoothing the joints as you go.
- Let It Cure: Allow the grout to set according to product instructions. This usually takes about 24 hours.
- Seal the Grout (Optional): Once dry, consider applying a grout sealer to protect it from future stains and moisture.
Common Mistakes to Avoid When Repairing Grout
While repairing grout can be a simple DIY task, there are pitfalls that many homeowners encounter. Skipping the cleaning step after removing old grout can lead to inadequate adhesion. Additionally, using too much water during clean-up can weaken the grout. Finally, not allowing sufficient cure time can cause future issues with the seal and durability.
Benefits of Grout Repair for Long-term Maintenance
Investing time in grout repair not only improves the look of your spaces but also extends the life of your tile. Good grout helps prevent moisture penetration, protecting underlying structures and reducing the risk of mold. Homeowners who regularly maintain their grout can save significantly on larger repair costs down the line.
Your Next Steps Towards a Beautiful Home
With these simple steps, you can manage grout repair with confidence. Not only will you enhance your home’s aesthetic, but you’ll also contribute to its overall health. For more home improvement tips and ideas, consider subscribing to DIY enthusiasts’ blogs or home improvement newsletters.


 Add Row
  Add
Add 
Write A Comment