Add Row
Add Element
cropper
update
Home Owners Vibes
update
Add Element
  • Home
  • Categories
    • interior
    • decor
    • inspiration
    • atmosphere
    • trends
    • design
    • comfort
    • Food & Travel
    • House Hold Tips & Ideas
    • home
    • Home Improvement Tips
    • Roofing & Exterior Maintenance
    • Interior Remodeling & Design
    • Budgeting & Financing for Home Projects
    • Hiring & Working with Contractors
    • Landscaping
    • Garden
    • Real Estate
July 23.2025
3 Minutes Read

Smart Fixes When Your AC Side Panels Won't Fit in Your Window

AC unit with ill-fitting side panels in window, installation issue.

Summer Heat Doesn’t Have to Be a Challenge

As summer heat settles in, many homeowners face the annual ritual of bringing window air conditioning units out of storage. This season, however, you may find yourself in a dilemma—a window AC unit that doesn't fit properly in your window frame. Whether you're in a new home with different window dimensions or simply upgrading to a new unit, there is no reason to sweat it. Let's walk through practical strategies to tackle this common issue.

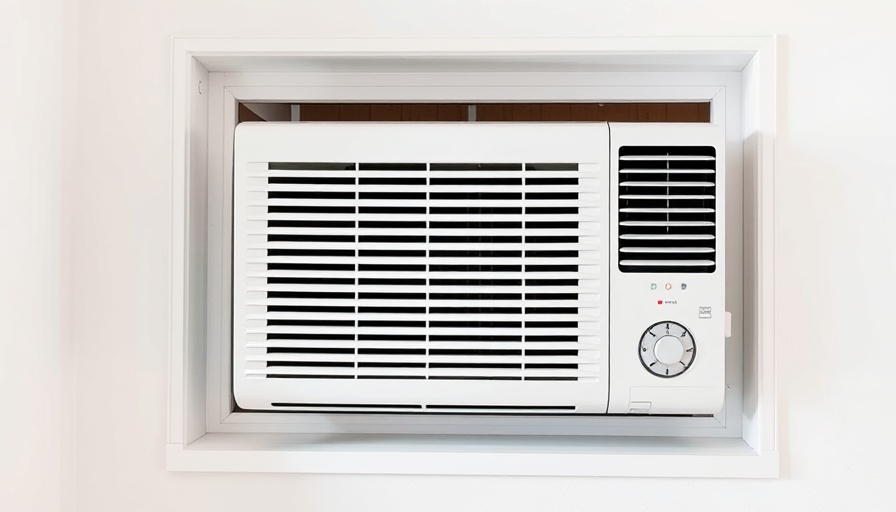
Understanding AC Side Panels

AC side panels are essential components that ensure the air conditioning unit fits snugly within the window frame. Made from plastic and designed specifically for each unit model, they seal gaps that could otherwise allow heat, dust, and insects to infiltrate your cool space. A tight fit not only helps your AC work efficiently but also keeps your home comfortable during sweltering conditions.

Simple Adjustments for a Perfect Fit

When faced with oversized windows, the first step is to consider your options:

  • Use One Panel: If your window is narrower, try removing one of the side panels. Shift the AC unit to one side and extend the remaining panel to cover the gap. If both panels are unnecessary, you can also seal the openings with weatherstripping for a neater, cooler room.
  • Create Custom Panels: Not rigidly bound to conventional sizes? Tailoring your side panels from various materials like plywood or Plexiglass can be a practical solution. Cut them to size and securely tape them where needed.
  • Upgrade Your AC: If the difference is significant—say your window is over a foot larger than the unit—consider investing in a larger air conditioner that fits better and functions more effectively.
  • Seal Remaining Gaps: Use adhesive-backed foam or weatherstripping for those pesky small gaps. A product like Flex Seal is perfect for making a temporary yet robust attachment that keeps outside air at bay.

Alternative Solutions

When traditional AC side panels just won’t do the trick, there are effective alternatives. As Micah Sherman, a Virtual HVAC Expert, suggests, foam board lined with tape is a great substitute. This not only seals your window but also provides some insulation against the outside temperature.

Why Every Homeowner Should Understand These Solutions

Understanding how to fit your AC correctly can enhance your home environment significantly. Not only does it keep your living space cool, but it can also save energy, reduce your utility bills, and prevent potential damage from moisture infiltration. Whether you're navigating your first summer with an air conditioning unit or you are a seasoned homeowner, these tips will ensure you stay comfortable during the hottest months.

A Call to Action

Before summer sweeps through and leaves you sweating, take the time to ensure your air conditioning setup is ready to battle the heat. Remember, a well-placed and fitted AC unit means a comfortable summer. Explore your window AC options today, and don't let fitting issues hold you back.

Home Improvement Tips

2 Views

0 Comments

Write A Comment

*
*
Related Posts All Posts
10.29.2025

Discover How to Use Temporary Hooks Without Damaging Your Walls

Update Understanding the Benefits of Temporary Hooks Temporary hooks have revolutionized the way homeowners can decorate and organize their spaces without damaging walls. These innovative products allow you to hang items with minimal risk of creating unsightly holes or marks, ideal for renters or anyone reluctant to commit to permanent solutions. The key to successfully using them lies in understanding the different types available and how to apply them correctly. Types of Temporary Hooks and Their Best Uses There are three main types of temporary hooks: adhesive strips, suction hooks, and magnetic hooks. Each type has its strengths depending on the surface and the weight of items being hung. Adhesive Strip Hooks: These hooks utilize strong, pressure-sensitive adhesives and work best on smooth, non-porous surfaces. However, be sure to avoid using them on textured walls or surfaces that have been painted recently. Suction Hooks: Suction hooks rely on a vacuum seal to hold items up. They perform admirably on smooth surfaces like tile or glass but may slip if overloaded. Regular maintenance is critical to ensure they do not pull down anything that’s hanging. Magnetic Hooks: These are excellent for metal surfaces and are less likely to damage walls. However, care should be taken to clean both the hook and the surface to avoid scratches upon removal. Why Proper Surface Preparation Matters To prevent damage from temporary hooks, proper surface preparation is essential. Always clean your walls with rubbing alcohol before adhering to prevent dirt or oils from compromising the adhesive's effectiveness. For painted walls, it’s also crucial to wait at least a week after a fresh coat of paint before applying adhesive hooks. Careful Removal: The Key to Avoiding Wall Damage Removing temporary hooks can be where the most damage occurs if not done correctly. Whether using adhesive, suction, or magnetic hooks, patience is crucial. For adhesive hooks, gently pull straight down to stretch the adhesive. If you encounter resistance, using a hair dryer to warm the adhesive can help. Suction hooks should be pried gently from the edges, avoiding forceful tugs that can damage wall surfaces. Alternative Hanging Solutions: Beyond Temporary Hooks While temporary hooks are a great solution for renters and those seeking flexibility, they are not the only option. Other tools such as command strips and even damage-free picture hanging solutions may provide additional support for heavier items. Always consider the weight limits before using any of these solutions to avoid potential mishaps. Conclusion: Taking Action to Safeguard Your Walls Using temporary hooks does not have to be a risk when you are equipped with the right knowledge. By understanding how to choose the proper hook for your needs and following the correct application and removal procedures, you can decorate your home with confidence. Now that you are informed, take steps to prepare your walls properly and enjoy your decorations worry-free!

10.27.2025

Unlocking Zip Ties: A Game-Changing Hack for Homeowners

Update Unlocking the Versatility of Zip Ties Have you ever found yourself surrounded by a collection of zip ties at the end of a DIY project? Often, these handy tools are viewed as single-use items, tossed aside or cut off never to be used again. Yet, what many don’t realize is that zip ties can be reused, significantly reducing waste and saving you money over time. A Simple Yet Effective Hack Thanks to Scott McGillivray’s insights on Ask…Scott McGillivray, we now know that zip ties aren’t meant to be used just once. In a recent episode, he demonstrated a quick and easy method to unlock and reuse these valuable DIY staples. The process is remarkably simple: after securing your items, all you need is a flathead screwdriver or a paperclip. Gently press down on the tab inside the zip tie’s latch, and voilà! You’ve successfully “unlocked” the tie, allowing you to repurpose it whenever needed. Why Reusing Zip Ties Matters Beyond cost savings and sustainability, understanding how to unlock zip ties enhances your flexibility during projects. Perhaps you secured something incorrectly or realized you needed a longer tie. Instead of cutting it off, this hack allows for quick adjustments without the waste of a new tie. It’s a straightforward solution that opens the door to more efficient problem-solving in your DIY endeavors. Addressing Common Misconceptions Many DIY enthusiasts may assume that once a zip tie is secured, it’s locked in place forever. This unfamiliarity with their reusability leads to unnecessary wastage. By dispelling this myth, we not only save resources but also teach new DIYers a valuable skill that can bring ease to their projects. Utilizing this hack often means fewer trips to the hardware store and less clutter from unused zip ties floating around in your toolbox. Tips for Successful Reuse To make the most of this zip tie hack, keep a small flathead screwdriver or a paperclip handy in your toolbox. It's also beneficial to practice unlocking a few ties to get the hang of the technique; it’s even something the kids can learn! Furthermore, always consider the size and type of zip ties you choose for your projects, and remember that heavier duty ties often warrant more care when unlocking. A Brighter Future with Better Practices With awareness and an intention to reuse, we can all contribute to a more sustainable approach in our craft projects. This little hack changes the way we view zip ties and demonstrates how simple adjustments can lead to significant savings. So next time you reach for a zip tie, remember: with a little finesse, you can unlock a world of possibilities!

10.26.2025

How Joining the Family Handyman Creators Program Boosts Your DIY Journey

Update Join the Family Handyman Creators Program: Elevate Your DIY Passion If you’re a DIY enthusiast with a knack for creativity and a social media presence, the Family Handyman Creators Program could be your next big opportunity. Family Handyman is looking to partner with individuals who are eager to share their DIY skills and connect with a community that values creativity and hands-on projects. What the Program Offers This innovative, three-month program invites aspiring creators to collaborate, produce content, and grow their audience. As a Family Handyman Creator, you will receive: Hands-on content workshops to refine your skills. Social media insights that can elevate your personal brand. Promotional support to amplify your reach. Imagine publishing a new video each week on the Family Handyman channels while simultaneously building your network and honing your craft! Are You the Right Fit? This program is ideal for you if: You have more than 7,000 followers on TikTok or 10,000 followers on Instagram. You are passionate about DIY and can produce, shoot, and edit your videos. You possess a unique perspective and compelling stories to tell through your content. As you innovate and create, you’ll join a supportive network that fosters both community and encouragement—all essential components for success in the DIY culture. The Rising Trend of DIY Content Creation The landscape of content creation is rapidly evolving. According to experts, the DIY niche offers ample opportunity, especially as more individuals aspire to enhance their homes through personal projects. The rise of social platforms has made it easier for creators to connect with their audience and their unique vision. As noted by Kirsti Lang in her guide for aspiring creators, authenticity is crucial. “Your voice and your perspective matter,” she emphasizes. Today’s audience is hungry for genuine connections and relatable stories that inspire them to tackle their own DIY projects. Tools and Resources to Get Started Starting out as a DIY creator comes with a blend of enthusiasm and strategic planning. Tools such as content calendars and photo editing software, like Canva and Lightroom, can streamline your work. Moreover, leveraging social media management tools ensures you can maintain consistency without feeling overwhelmed. Building Community and Engaging Your Audience Community is key to thriving as a DIY creator. Engage with your audience by responding to comments and fostering genuine relationships; this level of interaction can lead to long-term loyalty and collaboration opportunities. Building community also entails networking with other creators or influencers, which can enhance your visibility and support your growth. As documented in Honey Built Home, DIY influencers often emphasize the importance of delivering value through their content, whether by educating, entertaining, or inspiring their followers. When viewers see your journey, they’re more likely to engage, support, and replicate your efforts. Why Join the Family Handyman Creators Program? Participating in this program can be transformative. You’ll not only create content but engage with a trusted publication dedicated to DIY enthusiasts. The skills acquired and the networks formed can pave the way for new opportunities, brand partnerships, and possibly a thriving career in the creative space. So, are you ready to take your DIY passion to the next level and join a community that celebrates creativity? Apply to the Family Handyman Creators Program and start your journey today!

Terms of Service

Privacy Policy

Core Modal Title

Sorry, no results found

You Might Find These Articles Interesting

T
Please Check Your Email
We Will Be Following Up Shortly
*
*
*