Add Row
Add Element
cropper
update
Home Owners Vibes
update
Add Element
  • Home
  • Categories
    • interior
    • decor
    • inspiration
    • atmosphere
    • trends
    • design
    • comfort
    • Food & Travel
    • House Hold Tips & Ideas
    • home
    • Home Improvement Tips
    • Roofing & Exterior Maintenance
    • Interior Remodeling & Design
    • Budgeting & Financing for Home Projects
    • Hiring & Working with Contractors
    • Landscaping
    • Garden
    • Real Estate
July 04.2025
2 Minutes Read

Stay Safe on the Road: Understanding Hydroplaning and How to Prevent It

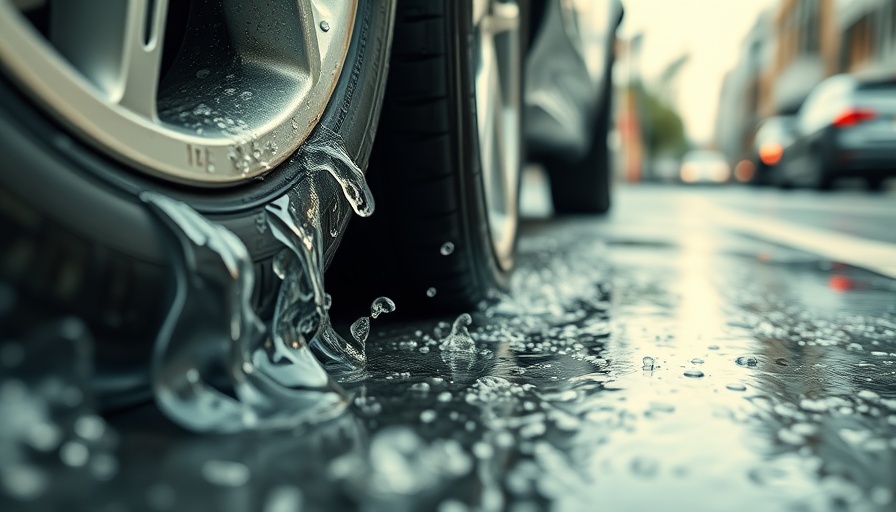
Car tire on wet road illustrating how to prevent hydroplaning.

Understanding Hydroplaning: What Happens to Your Tires?

Hydroplaning is akin to driving on ice, where your tire loses connection with the road due to a thin film of water. This phenomenon occurs when a tire collects more water than it can disperse, causing the tread to oversaturate. As defensive driving expert Robert Dillman explains, this can lead to a dangerous hydroplaning event, where control over steering, acceleration, and braking is severely compromised.

Why is Hydroplaning a Hazard?

Sliding over water can be incredibly perilous for drivers. When hydroplaning, tires are not gripping the road, making it difficult to steer or stop effectively. This leads to reduced control and increases the risk of accidents, especially when unexpected road conditions arise.

The Key Causes of Hydroplaning: What to Watch For

Road conditions significantly play a role in the likelihood of hydroplaning. Key factors include:

  • Water on the Road: Waterlogged roads are the primary culprits. If water accumulates above the tread, your tires struggle to maintain contact.
  • Road Oils: After dry spells, oil and grime settle on roads. When rain hits, these can create a slippery surface, heightening hydroplaning risks.
  • Weather and Speed: Fast driving in wet conditions drastically reduces the tire's ability to push water out of the tread, which can lead to hydroplaning.
  • Tire Condition: Worn out or improperly inflated tires have diminished performance in water, raising the risk of losing control.
  • Road Conditions: Smooth or poorly drained road surfaces can increase water accumulation, promoting hydroplaning.

Tips to Prevent Hydroplaning: Drive Smart

Preventing hydroplaning is crucial for vehicle safety. Here are some practical tips:

  • Maintain Tire Health: Ensure that your tires are regularly checked for wear and are properly inflated.
  • Adjust Speed: Slow down in rainy conditions, allowing tires ample opportunity to disperse water.
  • Avoid Sudden Moves: Make gradual turns and avoid abrupt braking to maintain control of your vehicle.

Future Insights: Car Technology and Hydroplaning

As technology advances, the automotive industry is focusing on enhancing tire designs and improving vehicle safety systems. Innovations like anti-lock brakes (ABS) and advanced traction control systems are paving the way for safer driving experiences, especially in challenging weather conditions.

Recognizing the Risks: Personal Stories

Many drivers have experienced the terrifying moment of hydroplaning. Sharing stories can raise awareness about the importance of safety. One driver recounted a near-miss due to a sudden rainstorm and hydroplaning that resulted, ultimately stressing the need for caution on wet roads. Such anecdotes can be powerful reminders of why we must prioritize safety.

What You Can Do Today

Understanding the factors and risks of hydroplaning empowers you to drive more safely. Regular tire maintenance, mindful driving, and learning about your vehicle's safety features can significantly enhance your road safety. So why not take a moment today to check your tire pressure and tread depth?

Home Improvement Tips

5 Views

0 Comments

Write A Comment

*
*
Related Posts All Posts
10.16.2025

Avoid Serious Damage: How to Winterize Your Hose Spigot Effectively

Update Why Winterizing Your Hose Spigot is Essential If you are a homeowner, you understand the importance of maintaining your property, especially as temperatures drop. Winterizing your hose spigot is a critical task that can prevent costly damages caused by freezing temperatures. In winter, any water left within the spigots can freeze and expand, resulting in cracked pipes and potential flooding when the ice melts. Master plumber Aaron Adams warns, "Out of sight, out of mind" often leads to significant problems during cold months. By taking a few proactive steps now, you can save your home from future headaches. Step-by-Step Winterization Process Winterizing your outdoor spigot might seem daunting, but it's a straightforward process. Follow these steps to ensure your spigot is ready for winter: 1. Locate the Shut-off Valve The first step is to find the shut-off valve inside your home, which controls the water supply to the hose spigot. Typically located on an interior wall behind the faucet, this valve can sometimes be hidden behind drywall or other renovations. If you have trouble locating it, consider consulting a plumber for assistance. 2. Switch Off the Water Supply Once you've found the valve, turn it off completely. This will stop water from flowing to the spigot, reducing the risk of ice formation. Make sure to turn off any main valve, such as a gate or ball valve, clockwise until it stops. 3. Open the Outdoor Spigot Next, go outside and turn on the spigot. This allows any remaining water to drain out. Allow the water to flow until no more drips are coming out, then turn the spigot off. If you have an upstream shut-off valve, crack it open (if applicable) to fully release any remaining water in the system. 4. Remove Hoses and Accessories Don’t forget to detach any hoses or accessories attached to the spigot. Draining these and storing them indoors will prevent them from freezing and getting damaged as well. Make sure to flip the hoses upside down to remove any trapped water. 5. Insulate the Spigot After all water has been drained, consider adding extra insulation to the spigot, especially if you live in a region prone to freezing temperatures. Covering the spigot with a styrofoam spigot cover or even an old towel can provide added protection against the cold. Frost-Proof Spigots: Do They Need Preparation? If you're lucky enough to have a frost-proof spigot, you still need to take precautions. While these spigots generally have features designed to prevent freezing, ensure there is no hose attached, as it can block drainage. To ensure peace of mind, using a cover on your frost-proof spigot is beneficial. Understanding Costs Associated with Frozen Pipes Failing to winterize your hose spigot can lead to significant repair costs. In areas where frozen pipes are common, the average repair cost can vary widely based on the extent of the damage. Knowing this, taking the time to winterize your hose spigot is a small investment compared to the costs of burst pipes. Final Thoughts Winterizing your hose spigot is one of the many essential preparations every homeowner should take. While it only takes a few moments, the long-term benefits of ensuring your plumbing system is protected can be invaluable. Avoid the hassles of water damage and costly repairs by making this a priority in your seasonal home maintenance routine.

10.15.2025

13 Surprising Things You Should Never Store in Your Garage This Winter

Update Understanding Garage Storage Challenges This Winter As winter looms, homeowners often face the challenge of optimizing their garage storage. While garages serve as the ideal sanctuary for cars and tools, they can also become a risky catch-all space, especially during colder months. Many people are unaware that certain items stored in garages can suffer significant damage due to fluctuating temperatures and humidity levels. This reality emphasizes the importance of knowing what should remain indoors and what can be safely stored in the garage. Essential Items Best Kept Out of the Garage Some common household items are not suited for the unheated environment of a garage. For example, propane tanks pose a severe safety risk when stored in an enclosed space. Experts suggest always placing them outside since they can leak and create flammable situations. Similarly, gasoline stored indoors can become stale, leading to expensive repairs on fuel-powered equipment come spring. Instead, homeowners are encouraged to drain fuel from lawnmowers and other gas-powered tools to prevent storage-related issues. The Risks of Storing Paint and Cleaning Supplies It’s a common misconception that garages are the best place to store paints and cleaning supplies. In fact, both items can become unstable or ineffective in cold temperatures. Water-based paints can freeze, and cleaning chemicals risk degrading when subjected to temperature swings. Therefore, it's best to store these items in a temperature-controlled environment—like your home—to ensure that they remain usable throughout the year. Surprising Additions: What Not to Store Perhaps surprisingly, items like canned food should also be removed from garage storage during winter months. The freezing temperatures can cause cans to burst, making a mess and wasting food. For convenience and safety, maintaining a dedicated food storage area inside the home is a wise choice. Garage Safety Should Be a Priority Taking proactive steps to ensure garage safety during winter are beneficial not only for the possessions stored within but also for overall household safety. Keeping the garage door functional and well-insulated not only helps to maintain energy efficiency but also provides peace of mind against fires and leaks. Regular maintenance, as highlighted in related articles, can deter unforeseen accidents caused by damaged items or improper storage decisions. Conclusion: Setting Up for a Safer Winter Understanding the essentials of winter storage in garages can protect your belongings and your home. By storing items thoughtfully, homeowners can adapt their garage from a cluttered space into a more organized, safe environment. To ensure safety and efficiency, prioritize second looks at storage routines as you prepare your home for winter. Working with professionals like those mentioned can also aid in creating the perfect garage setup that meets both your aesthetic and practical needs.

10.12.2025

Winterize Your Sprinkler System to Prevent Costly Damage

Update Prepare Your Sprinkler System for Winter: A Step-By-Step Guide As the chill of winter approaches, it's essential for homeowners to take proper measures to protect their sprinkler systems. Failing to winterize your irrigation setup could result in costly damage once temperatures plummet. In this guide, we’ll explore effective methods to secure your sprinkler system, ensuring it remains functional when spring arrives. The Importance of Winterizing Your Sprinkler System Winterizing your sprinkler system is crucial for those living in regions prone to freezing temperatures. Water left in pipes, valves, and other components can freeze, expand, and lead to fractures or leaks. According to landscape expert Skye Durrant, avoiding this task can leave homeowners with costly repairs come spring. Shut Off the Water Supply The first step in winterization is to shut off the main water supply, typically located in the basement or utility room. This is a critical step to prevent any water from freezing in the system. Landscape professionals recommend also turning off the sprinkler controller to ensure no water is sent through the system during winter. Simply switch it to an “off” position or use the controller’s rain mode. Drain the Backflow Preventer Next, focus on the backflow preventer, often positioned on an exterior wall. An effective winterization technique involves opening the test cocks and turning the shutoff valves to a 45-degree angle to release trapped water. If your unit has a drain plug, remove it to ensure all water escapes. Insulating the backflow preventer with foam insulation can provide additional protection from the cold. Blow Out the Sprinkler Lines Performing a blow-out is a highly effective method for clearing any remaining water in your sprinkler lines. Connect a high-volume air compressor to the system’s blow-out port, and run each irrigation zone until only air is expelled from the sprinkler heads. Durrant advises homeowners to watch instructional videos if this is their first attempt, as improperly performing this task can cause as much harm as neglecting it altogether. Timing is Everything: When to Winterize Ideally, winterization should occur before the first hard freeze, or once temperatures consistently dip into the 30s. Experts suggest that for established landscapes, winterization can happen earlier in the season. This proactive approach helps safeguard your investment and prepares your property for winter’s demands. Post-Winterization: Getting Ready for Spring Once winter has passed, opening drain valves and reactivating the water supply should be your first steps. After this, running each zone manually allows for a thorough check of the entire system. Inspecting for leaks, misaligned heads, or weak pressure ensures everything is in working order before the busy watering season begins. What Happens if You Skip Winterization? Neglecting to winterize your sprinkler system may result in cracked pipes and damaged sprinkler heads that can blossom into bigger repair costs. It's solvent to understand that preventative care is far less expensive than the repairs needed after ice has wreaked havoc on your system. Conclusion: Protect Your Investment With just a few steps, homeowners can effectively winterize their sprinkler systems to avoid expensive repairs when spring arrives. Remember to shut off water supplies, drain components, and blow out lines. Approaching winterization with care ensures that your investment remains intact, allowing you to enjoy a vibrant landscape year after year.

Terms of Service

Privacy Policy

Core Modal Title

Sorry, no results found

You Might Find These Articles Interesting

T
Please Check Your Email
We Will Be Following Up Shortly
*
*
*