Add Row
Add Element
cropper
update
Home Owners Vibes
update
Add Element
  • Home
  • Categories
    • interior
    • decor
    • inspiration
    • atmosphere
    • trends
    • design
    • comfort
    • Food & Travel
    • House Hold Tips & Ideas
    • home
    • Home Improvement Tips
    • Roofing & Exterior Maintenance
    • Interior Remodeling & Design
    • Budgeting & Financing for Home Projects
    • Hiring & Working with Contractors
    • Landscaping
    • Garden
    • Real Estate
August 05.2025
3 Minutes Read

Transform Your Kitchen with These Stylish Upgrades on a Budget

Modern minimalist kitchen with budget-friendly stylish upgrades

The Heart of the Home: Affordable Kitchen Transformations

The kitchen is often referred to as the heart of the home, serving as a central gathering place for families and friends. When it comes to home improvements, refreshing this space can enhance both functionality and aesthetic appeal. If you’re looking to upgrade your kitchen on a budget, you’re not alone. Many homeowners discover that small, stylish upgrades can make a significant impact without breaking the bank.

1. Brighten Up with New Light Fixtures

One of the easiest and most effective upgrades you can make in your kitchen is changing out your lighting fixtures. If you’re still hanging onto those outdated fluorescent tubes, it’s time for a change. Replacing them with stylish pendant lights or modern sconces can drastically transform the ambiance of your cooking space. Not only do new fixtures provide a fresh look, but they can also improve the functionality of the space by enhancing visibility, ensuring you can navigate safely while whipping up your favorite meals.

2. Hardware Refresh: Small Changes, Big Impact

Another quick way to elevate the style of your kitchen is by replacing old cabinet and drawer hardware. A new set of knobs or sleek handles can rejuvenate tired furniture, offering a modern twist without the hassle of a complete kitchen remodel. This small update is not only affordable but also allows for tons of personalization that can reflect your taste—consider metallic finishes, vibrant colors, or elegant designs that catch the eye.

3. Peel-and-Stick Backsplash: A Trendy and Practical Choice

The introduction of peel-and-stick backsplash tiles has been a game-changer for budget-conscious homeowners looking to improve their kitchens. These easy-to-apply tiles mimic the luxurious appearance of traditional tile at a fraction of the cost. They can even be applied directly over existing tiles, making installation a breeze. By opting for a trendy design, such as faux marble or geometric patterns, you can add a touch of class to your space without the commitment of heavy renovations.

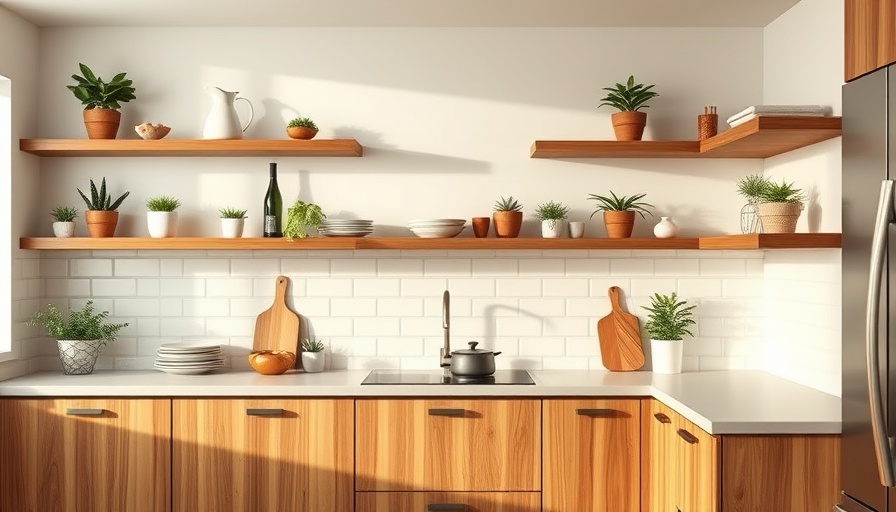
4. Durable and Affordable: Wood Countertops

For an upgrade that combines durability and natural beauty, consider installing wood countertops. Particularly favored for their warmth and classic look, butcher-block countertops are not only functional but also easy to maintain. With a little sanding and refinishing, you can keep them looking brand new. This option is usually more budget-friendly compared to stone countertops and adds a rustic charm that complements modern interiors beautifully.

5. Simple Charisma: Adding Molding

Finally, if you want to introduce a little character to your kitchen, consider adding some molding. This project doesn't require extensive remodeling skills and can significantly enhance the overall look of your kitchen. Whether you choose to add chair rails or crown molding, these small architectural details add depth and interest to your walls, allowing you to show off art or photographs in style.

Upgrading your kitchen doesn’t have to be an overwhelming task filled with expensive renovations. With these five budget-friendly ideas, transforming your space can be fun, rewarding, and surprisingly quick. So roll up your sleeves and get ready to create a stylish kitchen that reflects your personality—because your home deserves a little love!

Ready to tackle these upgrades? Remember, even small changes can make a big difference in how you feel about your kitchen!

Home Improvement Tips

4 Views

0 Comments

Write A Comment

*
*
Related Posts All Posts
12.14.2025

Unlock the Secrets to Splitting Wood with an Axe Safely

Update Mastering the Art of Splitting Wood: A Practical Guide Splitting wood with an axe offers more than just a physical workout; it connects us to nature and the primitive skills of our ancestors. Understandably, the allure of splitting wood might stem from the satisfying thunk as the axe meets the log, but more importantly, it’s essential to prioritize safety and technique. Whether you’re preparing firewood for chilly nights or wish to engage in a sustainable practice, learning how to do it correctly can enhance your experience significantly. Choosing the Right Tools for the Job The journey of splitting wood begins with the right tools. To feel in control and ensure successful splits, you’ll want to invest in ax or splitting maul that suits your strength and comfort level. An axe is lighter and ideal for smaller logs, while a splitting maul’s heavier head offers the weight needed to tackle larger, tougher logs. Before starting, check that your axe is sharp; a dull blade can make the task frustrating. Safety: Your First Priority Before you swing that axe, take a moment to think about safety. Wearing protective gear like safety glasses and gloves enriched with grip can make a significant difference. Understanding where to stand when preparing to split logs is crucial. Position yourself in such a way that should your aim miss, the axe won’t come too close to your feet or legs. Working in an open area and having a buddy by your side can serve as an extra layer of safety. Optimal Techniques for Splitting Wood Technique makes all the difference when it comes to successful wood splitting. First, ensure that the log is placed on a sturdy surface, ideally a chopping block. This not only helps in the splitting process but also aids in protecting the blade's integrity. When you swing, focus on using your body weight rather than just your arm strength; this technique aligns with advice from wood-splitting experts who suggest using momentum for better results. A Quick Look at Common Misconceptions One prevalent myth regarding wood splitting involves the necessity of executing a perfect cut. Many believe the axe must strike perfectly every time for a successful split. In reality, hitting close to the intended mark can still result in a successful split; it’s about hitting the grain rather than achieving flawless precision. Additionally, beginners might think that higher swings lead to better force, but this can lead to less control and increased risk. Conclusion: Embracing Your Inner Lumberjack Whether you are splitting wood for a cozy fire or simply enjoying a weekend project, honing your skills provides numerous benefits. With the right tools, emphasis on safety, understanding technique, and a bit of practice, you can master wood splitting and earn that satisfying thunk. So grab that axe, call a friend to share the experience, and enjoy the great outdoors while adding a vital skill to your repertoire! If you’re ready to embrace the art of splitting wood, start now by gathering your tools and planning your project safely. Remember, the next time you hear the sound of the axe hitting the wood, you’ll not only feel accomplished, but also deeply connected to a tradition that has existed for ages.

12.13.2025

Discover Why the Saatva Graphite Mattress Topper Is 2025's Best Bedding Choice

Update Experience Unmatched Comfort with the Saatva Graphite Mattress Topper If you often wake up feeling sore or stiff, you're not alone. Many homeowners struggle with getting a good night's sleep and often overlook how much their mattress contributes to those restless nights. Enter the Saatva Graphite Mattress Topper, hailed as the best bedding item of 2025. Not only can this topper enhance your existing mattress, but it can also significantly improve your overall sleep quality. Why the Saatva Graphite Topper Stands Out The Saatva Graphite Memory Foam Mattress Topper is a 3-inch thick layer of plush, pressure-relieving memory foam infused with cooling graphite. This innovative design provides excellent support and helps keep you comfortable throughout the night. The combination of these features allows the topper to alleviate pressure on joints and the spine, making it ideal for those who wake up with discomfort or stiffness from their mattresses. Real-Life Transformation: A Personal Testimonial Mary Hen, the tester behind this year's selection, shares her journey from chronic back pain to restful nights. After giving birth, her mattress felt too firm for her newfound needs, leaving her with unbearable discomfort. Upon trying the Saatva topper, she experienced immediate relief, noticing a reduction in stiffness and aches the very next morning. This personal story highlights the transformative power of the right mattress topper. The Perfect Companion for Side Sleepers Side sleepers particularly benefit from the Saatva Graphite topper’s design. As noted by reviewers from Sleep Advisor and others, this topper's medium firmness balances supportive sleep with pressure relief, ensuring that body alignment is maintained. Especially for those who might experience pressure points at the shoulders or hips, the memory foam’s contouring properties work wonders. Durability and Practicality: What to Expect In terms of durability, the Saatva Graphite topper is built to last. Reviewers have highlighted that even after multiple moves and guest uses, it has shown no signs of wear and tear. This durability, combined with its pressure-relief features, makes it a worthwhile investment for homeowners looking to extend the life of their mattresses without breaking the bank. Considerations Before Purchasing While the Saatva Graphite Mattress Topper boasts many positives, potential buyers should also be aware of some limitations. It’s not machine washable, which might be a concern for those looking for low-maintenance options. Additionally, lighter sleepers may find it slightly firm, indicating that the topper is best suited for those with a higher sensitivity to firmness levels. A No-Risk Investment One of the standout aspects of the Saatva Graphite topper is its 180-night trial period. This allows potential buyers ample time to test its effects on their sleep patterns. With a commitment to customer satisfaction, Saatva ensures you can make an informed decision with no risk of being stuck with an unsuitable product. The Bottom Line: Is It Worth It? If you’re looking to enhance your sleep experience and tackle those pesky mornings filled with discomfort, the Saatva Graphite Mattress Topper is undoubtedly worth considering. It's more than just a bedding accessory—it's an investment in your overall well-being. Plus, with its impressive reviews and user satisfaction, you can feel confident in your decision. For homeowners recognizing the value of good sleep, this topper is a game-changer. Consider giving it a try and elevate your home’s comfort today.

12.12.2025

Craft Your Own DIY Copper Pipe Coffee Maker: A Holiday Delight

Update Elevate Your Coffee Game with a DIY Copper Pipe Coffee Maker As the holidays approach, many of us are looking for ways to create a warm and welcoming atmosphere in our homes. One delightful way to do this is by enhancing your coffee routine. Surprisingly, creating a charming DIY copper pipe coffee maker can combine functionality and artistry, making it a perfect addition to your kitchen. Why Choose a Copper Pipe Coffee Maker? The allure of a copper pipe coffee maker lies in both its aesthetic appeal and its performance. This unique design not only looks stunning but also provides a satisfying brewing experience. According to DIY enthusiasts, there’s an inexplicable beauty in simplicity that not only makes the process enjoyable but results in a superior pour-over coffee. The warm glow of copper can transform your kitchen into a cozy café, perfect for entertaining guests or enjoying a quiet morning. Gather Your Materials and Start Your Project This project is budget-friendly, costing less than $100, and can be tackled by beginners with just a few hand tools. The essential materials include copper pipes, fittings, and a glass funnel. Follow this basic list of supplies: 1/2-inch copper pipe, 90-degree elbows, couplers, and a colorful borosilicate glass funnel. These elements not only help in brewing a fantastic cup of coffee but also create an eye-catching centerpiece for your kitchen. Step-by-Step: From Concept to Creation The process begins by measuring and cutting the copper pipes to size. Ensure to dry fit all parts first, as this prevents mistakes and allows for creativity in adjusting your design. Once ready, use CA glue for securing the connections, ensuring a clean and strong bond. This project emphasizes the importance of taking your time and enjoying each step, making it a rewarding experience that can be shared with family and friends. How This Project Unites Family and Friends What’s more, making a DIY copper pipe coffee maker is an excellent opportunity to bond with loved ones. Inviting family members to join you can turn this project into a cherished memory. Through collaborative efforts, not only do you create something beautiful together, but you also spark conversations about favorite coffee recipes and traditions over a shared cup. Considerations for Your Design and Space To ensure your coffee maker fits well in your kitchen, think about customizing the height and dimensions. Some DIYers choose to combine materials, like wood, alongside copper to enhance the overall aesthetic and functionality. Consider how the design can complement your existing decor while staying practical for everyday use. Make It Your Own! The beauty of DIY projects is the ability to personalize each creation. You can engrave your coffee maker with a meaningful quote or even add your favorite coffee blend to the mix, inviting a unique flavor every time you brew. As you progress, feel free to adjust the design and even explore different finishes for the copper to find what resonates best with you. Embarking on this DIY project not only enriches your home with a unique coffee brewing experience but also creates new stories and memories shared over countless cups of coffee. This holiday season, treat yourself and your loved ones to the joy of coffee-making – one beautifully crafted cup at a time. So, gather your materials, roll up your sleeves, and let this DIY copper pipe coffee maker be a centerpiece of warmth in your home this winter!

Terms of Service

Privacy Policy

Core Modal Title

Sorry, no results found

You Might Find These Articles Interesting

T
Please Check Your Email
We Will Be Following Up Shortly
*
*
*