Add Row
Add Element
cropper
update
Home Owners Vibes
update
Add Element
  • Home
  • Categories
    • interior
    • decor
    • inspiration
    • atmosphere
    • trends
    • design
    • comfort
    • Food & Travel
    • House Hold Tips & Ideas
    • home
    • Home Improvement Tips
    • Roofing & Exterior Maintenance
    • Interior Remodeling & Design
    • Budgeting & Financing for Home Projects
    • Hiring & Working with Contractors
    • Landscaping
    • Garden
    • Real Estate
March 23.2025
2 Minutes Read

Why Isn’t My Window Air Conditioner Blowing Cold Air? Troubleshoot Now!

House with window air conditioner under a sunny sky.

Why a Window Air Conditioner Might Fail to Cool

When summer heat waves roll in, few things are as essential as a functioning window air conditioner. However, it can be disheartening when your AC stops blowing cold air. Fortunately, diagnosing and fixing the problem can often be easier than you think.

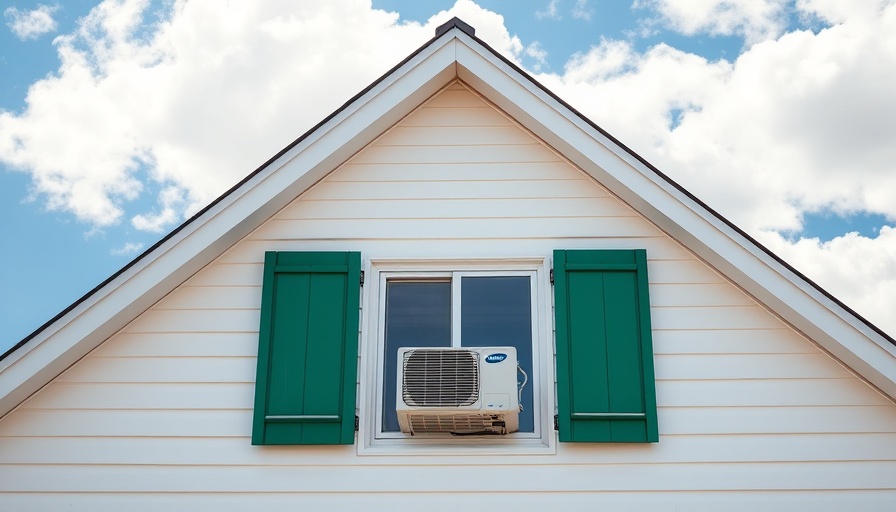
Understanding Your Window AC Unit

First, you need to ensure that your unit is powered on and properly installed. Keep an eye out for any gaps that let warm air invade your space. If left unchecked, a poorly installed unit may struggle against the very elements it's meant to combat. If you see daylight between the unit and the window frame, seal it up to enhance efficiency.

Common Troubleshooting Techniques

If your AC is receiving power but not functioning correctly, the issue may lie in one of four major areas: airflow, temperature control, control panel, or cooling system. Of these components, airflow is often the easiest to troubleshoot and fix.

Airflow Issues: The Most Frequent Culprit

A dirty air filter can severely restrict airflow, making the AC unit work harder while delivering subpar cooling. Most filters can be accessed from the front grille and should be inspected and cleaned regularly.

Additionally, check for debris blocking the fan or the cooling coils. Clear any accumulated trash to ensure your fan's optimal performance. Sometimes, simply cleaning these parts of your air conditioning unit can effectively restore cooling power, getting your home back to a comfortable temperature.

Key Maintenance Tips for Optimal Cooling

To prevent future issues, perform routine maintenance on your air conditioner. This includes:

  • Regularly cleaning or replacing your air filter.
  • Checking the unit for any obstructions around the intake and exhaust vents.
  • Inspecting the cooling coils for dirt buildup.

Investing time in these small, preventive measures can save you the frustration of battling a broken air conditioner during peak summer.

When to Call in the Professionals

If you've addressed airflow and the unit still isn't working, it may be time to call in a professional. There could be underlying issues, such as refrigerant leaks or compressor failures. Ignoring these issues could lead to more significant problems down the line, making it essential to seek help when needed.

Conclusion: Keep Cool This Summer

Understanding why your window air conditioner isn’t blowing cold air empowers you to tackle the problem head-on. Regular maintenance goes a long way in ensuring your unit works efficiently. Stay proactive in caring for your air conditioning system, and don’t hesitate to seek help when necessary. Beat the heat by keeping your indoor space cool and comfortable!

Home Improvement Tips

8 Views

0 Comments

Write A Comment

*
*
Related Posts All Posts
10.20.2025

Transform Small Spaces with the Best Modular Sectionals for Your Home

Update Finding the Perfect Sofa for Your Cozy Abode In the world of interior design, choosing the right sofa can transform a small living space from cramped to cozy. For homeowners grappling with limited square footage, the challenge often lies in striking the balance between comfort, aesthetics, and functionality. But fret not, as modular sectional sofas are paving the way for stylish solutions that can adapt as your lifestyle changes. Making the Most of Small Spaces with Modular Sectionals While sectional sofas have historically been associated with larger rooms, their modular counterparts are specifically designed to cater to smaller spaces. A modular sofa can double your seating while minimizing the ‘cluttered’ look often associated with traditional arrangements. As interior designer Caroline Burke states, “A sectional can give you that maxed-out seating without making the room feel stuffy.” Top Picks for Small Sectionals Based on various tests and expert reviews, the Lovesac Sactional stands out for its adaptability and durability, offering a variety of configurations that cater perfectly to small living rooms. Additionally, options like the Burrow Block Nomad Sofa and the Albany Park Kova Pit provide excellent family-friendly features, allowing for flexibility and comfortable lounging. The Worthwhile Investment: Quality over Quantity When shopping for your perfect small sectional, investing in quality is paramount. The right modular sofa should not just enhance the aesthetic appeal of your living space, but also offer durability over time. Sofas made with solid wood frames and performance fabrics like those featured in the Joybird Logan Modular U-Sofa can withstand spills, kids, and pets, while still looking stylish. Expert Tips for Choosing the Right Sofa Before making a purchase, measure your space to ensure a good fit. Remember, modular sofas can be rearranged, giving you the freedom to play with configurations. Additionally, opt for pieces that come with removable, washable covers, especially if you have children or pets. These features not only offer convenience but also add to the longevity of your investment. Conclusion: Craft Your Comfort Zone Finding the perfect sofa for small spaces can be daunting, but with the right modular sectional, you can enhance both comfort and style. As you explore the market, focus on the adaptability, durability, and quality of the materials. Embrace the versatility of modular designs, and turn your cozy abode into a welcoming haven for relaxing and entertaining.

10.19.2025

Transform Your Holiday Decor with This Pool Noodle Hack!

Update The Ingenious Pool Noodle Hack for Holiday CheerWith the holiday season fast approaching, many homeowners are on the lookout for festive and creative ways to spruce up their living spaces without causing damage. Enter the pool noodle, a simple yet versatile household item that can be transformed into a stunning fireplace decoration. Thanks to TikTok user @craftybudgetqueen, this ingenious hack not only beautifies your mantel but also ensures it's damage-free! Here’s how to create a festive focal point that will impress your guests and light up the holiday spirit.How to Create a Damage-Free Holiday MantelThe process begins with a basic pool noodle: an affordable and easily accessible material perfect for this holiday project. Start by cutting your pool noodle to the desired length and slicing it open. This will allow you to fit it snugly over the edge of your mantel without leaving unsightly marks or residue. Make evenly spaced vertical cuts along the noodle to create slots for inserting decorative stems; this is where the magic happens!Once your noodle is securely in place, you can begin adding beautiful decorations. Fake evergreen garlands work wonderfully; their flexible branches can create elegant swoops across the mantel. To add color and texture, insert faux poinsettias to hide the pool noodle while giving your décor a rich, vibrant look. Fill in any gaps with faux holly berries and white berries to achieve a layering effect that captures the eye.Adding the Finishing TouchesThe final addition for a glowing ambiance involves adding tea lights to the flutes you've created. If you're worried about fire hazards, consider using electric tea lights or filling the flutes with sparkly red and white beads instead. This way, you can enjoy the flickering candlelight while keeping safety in mind. The combination of floral elements and gentle lighting creates a warm, inviting atmosphere that embodies the spirit of the holidays.Why This Hack is Perfect for Every HomeThis pool noodle hack is not only practical but also offers a creative outlet for homeowners who love to decorate without the clutter of permanent fixtures. The very nature of this design allows for easy modifications, whether you want to switch out colors or styles for different occasions. Importantly, this approach to decorating caters to the eco-conscious mindset many are adopting, as it involves repurposing everyday items into holiday decor.Explore More Decoration IdeasWhile the pool noodle hack is fantastic, there are other budget-friendly alternatives worth considering for holiday decoration. Florist foam could serve as a base, but it may not offer the same stability as a noodle. Ready-to-use garlands with built-in lights provide a hassle-free solution if you prefer a more straightforward approach. Ultimately, the goal is to create a pleasing atmosphere that feels festive without overwhelming your living space.Embrace Your Creativity!As you dive into your holiday preparations, remember that your home is a canvas for expressing joy and warmth. These simple decoration hacks not only enhance your space but also reflect your personal style. So grab a pool noodle, unleash your creativity, and transform your mantel into your holiday masterpiece!Are you ready to give your home a festive touch this holiday season? Try out the pool noodle hack and share your unique designs online!

10.18.2025

Transform Your Entryway with a Custom Hall Tree Build

Update Transform Your Entryway: Build the Dream Hall Tree Your entryway sets the tone for your home, and incorporating an entryway hall tree not only elevates the style but also enhances functionality. A hall tree, which typically combines a coat rack, bench, and storage, can redefine daily routines, allowing for a clutter-free space where shoes, backpacks, and coats have designated places. Imagine entering your home and immediately feeling a sense of order! This article will illuminate how to create your own stylish hall tree tailored to your unique décor. The Benefits of a Customized Hall Tree Building your own hall tree allows for personalization that store-bought options simply can’t provide. Many pre-made hall trees start at around $500, and even those may not fit perfectly in your space. With DIY, you maintain control over the dimensions, materials, and design aesthetics, tailoring it to blend seamlessly with your existing interior. From rustic farmhouse to contemporary minimalism, your hall tree can uniquely reflect your style. DIY Project Planning: Key Considerations Before diving into construction, careful planning is essential. First, measure your entryway and decide the optimal dimensions for both style and functionality. As highlighted in reference articles, choosing the right wood type according to your skill level and budget is pivotal: softwoods like pine are forgiving for novices, while hardwoods such as oak lend a more polished finish. Additionally, be sure to sketch out your designs, plotting in storage options, bench depth, and height. Essential Tools for the Build Gathering the right tools can be the difference between a successful project and a frustrating one. You will need the basics like a measuring tape, circular saw, and drill. Notably, having a miter saw and a pocket hole jig can greatly simplify the construction process, allowing for precise cuts and strong joints. Check out specialty stores or borrow from friends if you lack certain tools. Step-by-Step Guide to Your Hall Tree Let’s delve into building your hall tree! Begin by constructing the base and connecting it securely with pocket holes. Assemble the cabinet, carefully following the plans to ensure each component fits perfectly. Paying attention to detail will go a long way – ensuring that everything is square and properly aligned will save you a headache later. It’s here that you can infuse creativity: add a cushioned seat for comfort, decorative hooks, or cubbies for shoe storage. Common Mistakes to Avoid Even seasoned DIYers can overlook critical steps. One common hiccup is forgetting to adjust for space limitations; consider your ceiling height and floor clearance before installation. Another issue is using shortcuts during assembly or skipping measurements – this typically leads to more trips to the craft store and added costs. Proper preparation and a willingness to tackle adjustments as needed are key to a satisfying project. Maintaining Your Hall Tree for Longevity Once you’ve built this beautiful addition to your home, it’s important to maintain it. Regularly clean with a damp cloth, and keep an eye on the hooks and joints for wear and tear. Over time, you may want to reapply polish or repaint to keep it looking sharp. Embrace the evolution of your hall tree; as your style changes, so too can your organization methods. Inspiration for Future Projects Creating your own hall tree can ignite the DIY spirit in you, leading to even more home projects. Whether it’s matching benches in your mudroom or incorporating clever storage solutions throughout your house, the skills you gain from this project will empower you to tackle anything. From simple refinishing to larger scale builds, let your creativity flow! Ready to embark on your hall tree journey? Measure your space, gather your tools, and let your imagination guide you. Remember, even small mistakes are part of the learning curve, and each step brings you closer to a functional masterpiece!

Terms of Service

Privacy Policy

Core Modal Title

Sorry, no results found

You Might Find These Articles Interesting

T
Please Check Your Email
We Will Be Following Up Shortly
*
*
*